Resting-State fMRI with the new UI
How to launch the new UI
- Open a terminal session and connect to your HPC (if applicable).
- Run an Interactive Job on the cluster (see the note above)
- Note: If running on a HPC, you need to run an Interactive Job on the cluster. To do this, please refer to your HPC’s documentation. Then load Singularity/Apptainer packages:
module load singularity.
- Run the Execution Command for your container software.
apptainer run --contain --cleanenv --bind /:/ext halfpipe_1.2.3.sif --use_cluster --tui File Location: Ensure the HALFpipe_1.2.3.sif file is in your current working directory or specify its full path.
New UI flag: Use the
--tuiflag to launch HALFpipe with the new UI.Cluster Flag: Use the
--use-clusterflag when running the execution command on an HPC.
- Open a terminal session via Docker Desktop.
- Run the docker command.
docker run --interactive --tty --volume /:/ext halfpipe/halfpipe:1.2.3 --subject-chunks --nipype-n-procs 1 --keep none --tui- Note: To access your files more easily, you can bind in the path where the data, working directory and atlases are located.
For example: --volume /home/user/scratch:/home/user/scratch
Note 1: The flags --subject-chunks and --nipype-n-procs 1 are optional. While they may slow down the pipeline, they help ensure you don’t exceed your computer’s processing capacity. Use them if you’re concerned about system limitations.
Note 2: On some systems, Docker will restrict the number of CPU cores available to HALFpipe by default. If your computer can handle it, you can allocate more CPUs using the Docker flag --cpus. Refer to your system’s documentation to learn your CPU limitations.
By adding more CPUs, you can add the HALFpipe flag --nipype-n-procs to accelerate the process. For example:
docker run --interactive --tty --cpus=3 --volume /:/ext halfpipe/halfpipe:1.2.3 --nipype-n-procs --subject-chunks --keep nonePipeline settings
You have now opened the new user interface (UI) of HALFpipe.
This new interface is user-friendly: you can navigate it using your mouse and select different parameters by clicking on them.
We will first specify the pipeline settings and then the Features.
With this new UI, there are different icons you can interact with:
👁️ : To visualize files found
🖌️ : To edit the section
❌ : To delete the section
❎ : Item selected
✖️ : Item not selected
ℹ️ : To get more information about the section
Specify your working directory
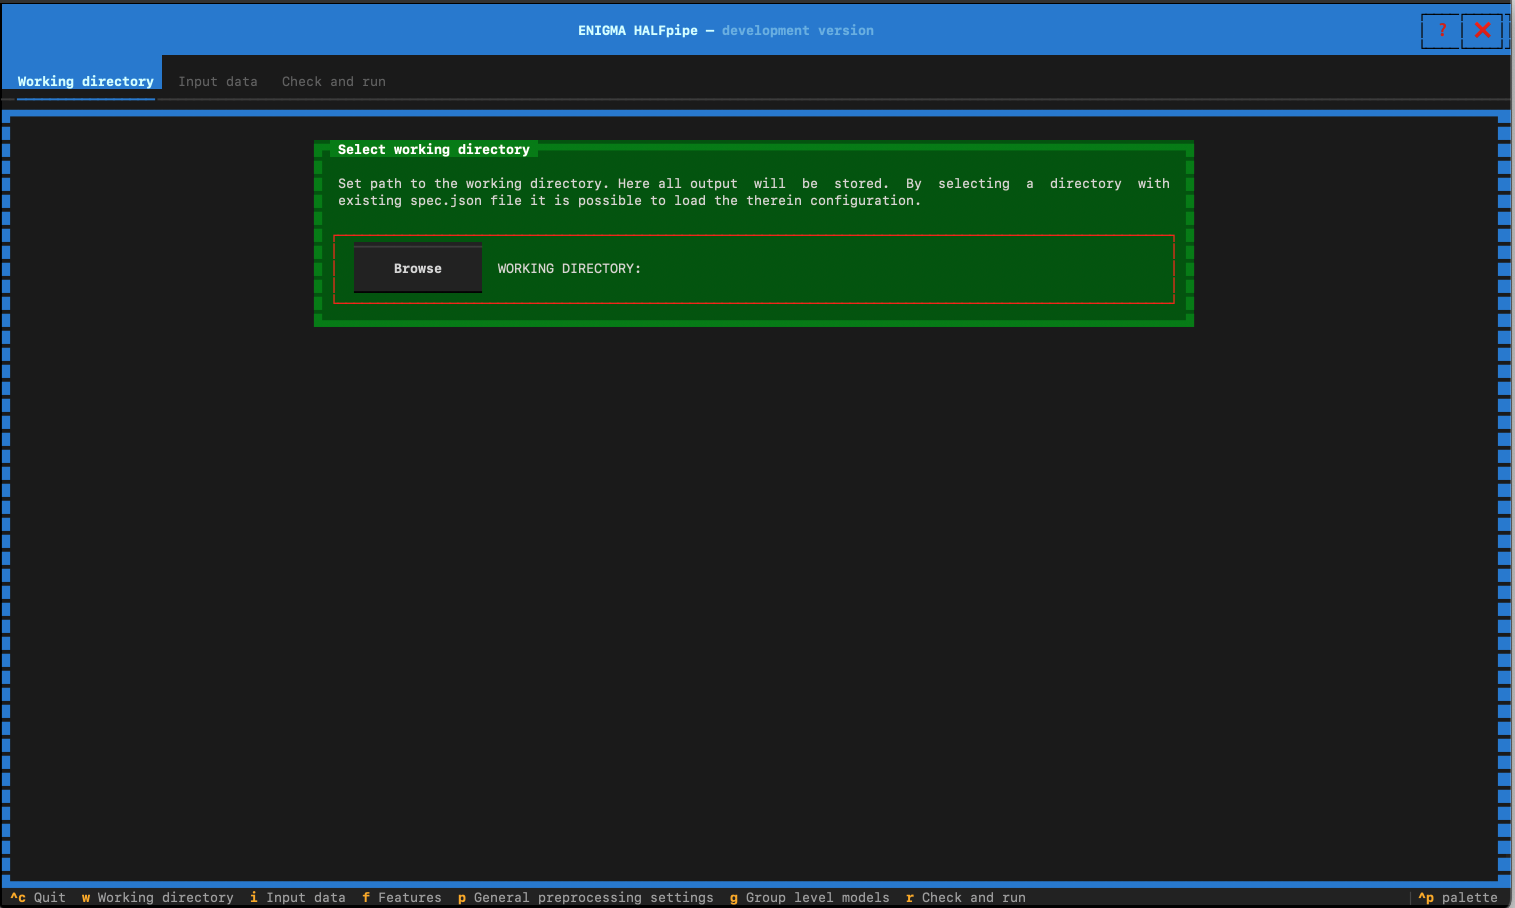
- Click on Browse.
- Indicate the path you want your working directory to be located. This correspond to your output folder.
To create a new directory, simply add its name to the end of the path. If the folder doesn’t exist, a message will appear indicating it wasn’t found and will prompt you to create it. Click ‘Yes’ to proceed and generate the output folder.
- After specifying the working directory, click on Input Data in the top navigation bar.
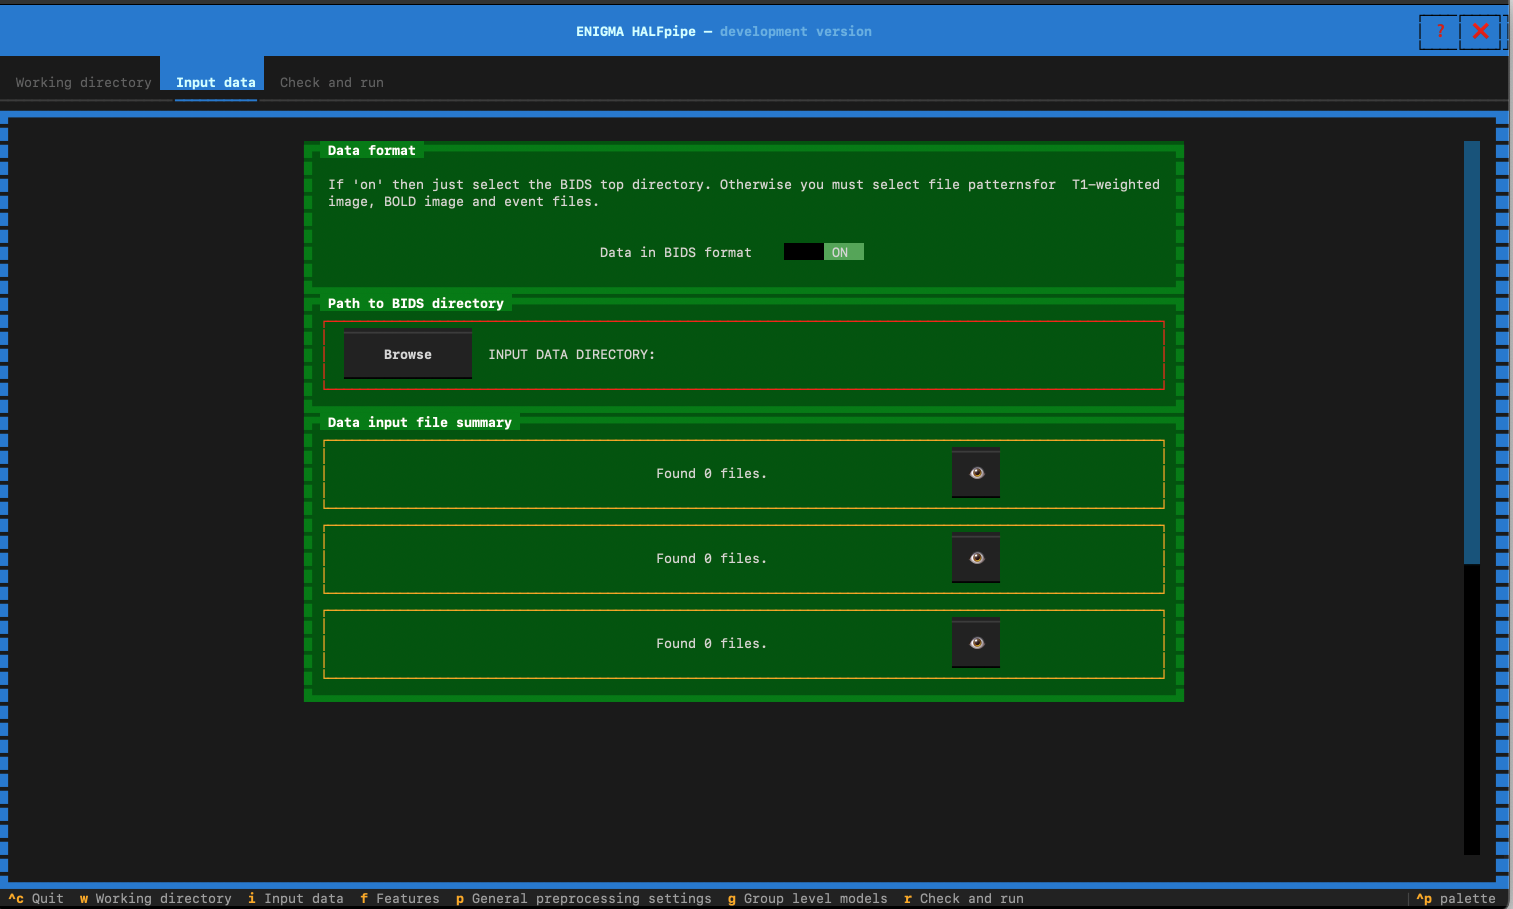
Specify your Data location
Indicate whether or not the data is in BIDS format
- Click on Browse.
- Here, simply indicate the path to your BIDS data. Files will be automatically found, this can take a moment.
- Click on General preprocessing settings in the top navigation bar, and go to the next section.
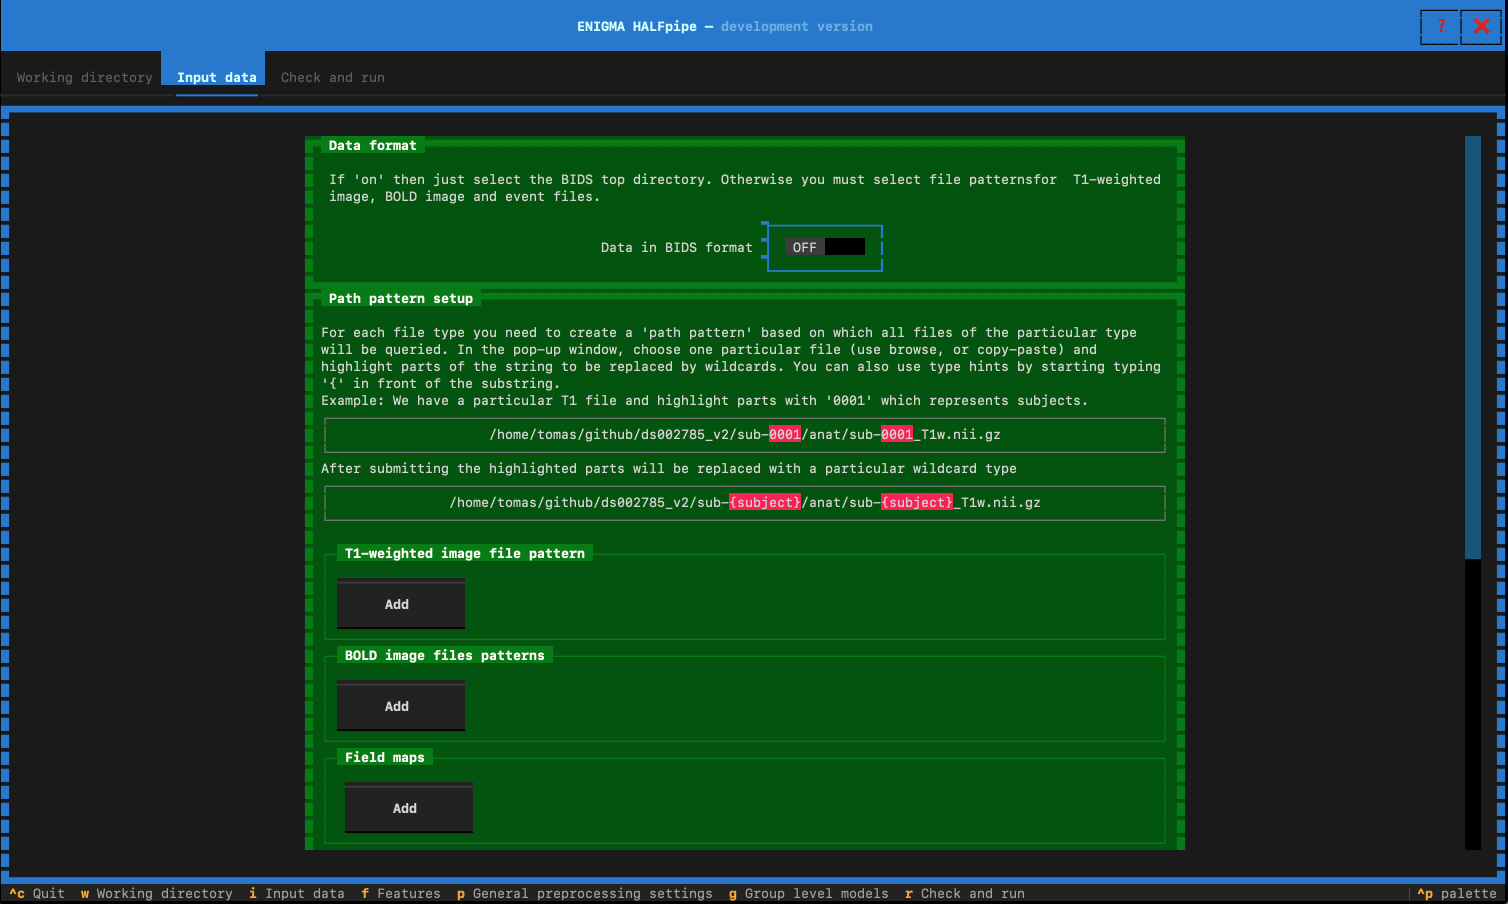
- Switch the button to OFF
- Under the section T1W-weighted images, click on Browse.
- Select the T1W-weighted file of 1 subject.
- Delete the unique subject ID and replace it with
{subject}. If applicable, do the same with{run}and{session}.- As you modify the path, HALFpipe will indicate how many files it has found. Once your path is correct and all subject files are detected, click OK to save the path.
- Follow the same logic for the BOLD data and Field maps (if any) sections.
- Check repetition time values : click on YES (unless the TR is incorrect)
- Go to the bottom, and click on Confirm
- Click on General preprocessing settings in the top navigation bar, and go to the next section.
- If your data is organized as
path/to/T1/subj01/T1.nii.gz- where subj01 can be any ID you have to enterpath/to/T1/{subject}/T1.nii.gz. - It will then find T1 files for all subjects:
path/to/T1/subj01/T1.nii.gz,path/to/T1/subj02/T1.nii.gzetc…
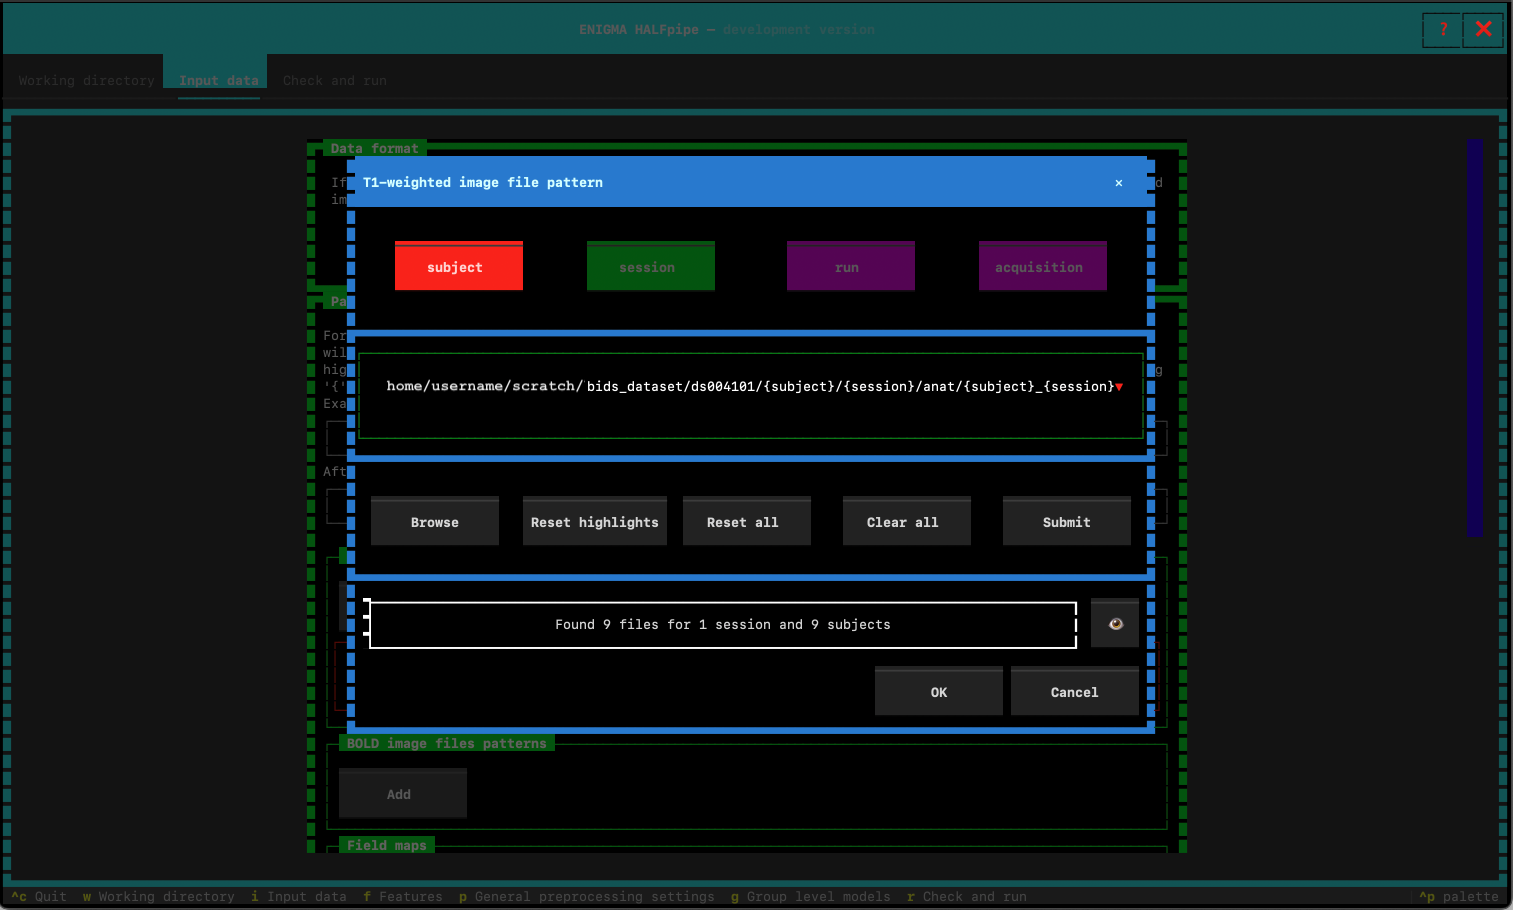
If your files have been successfully imported, you should see the follow message:
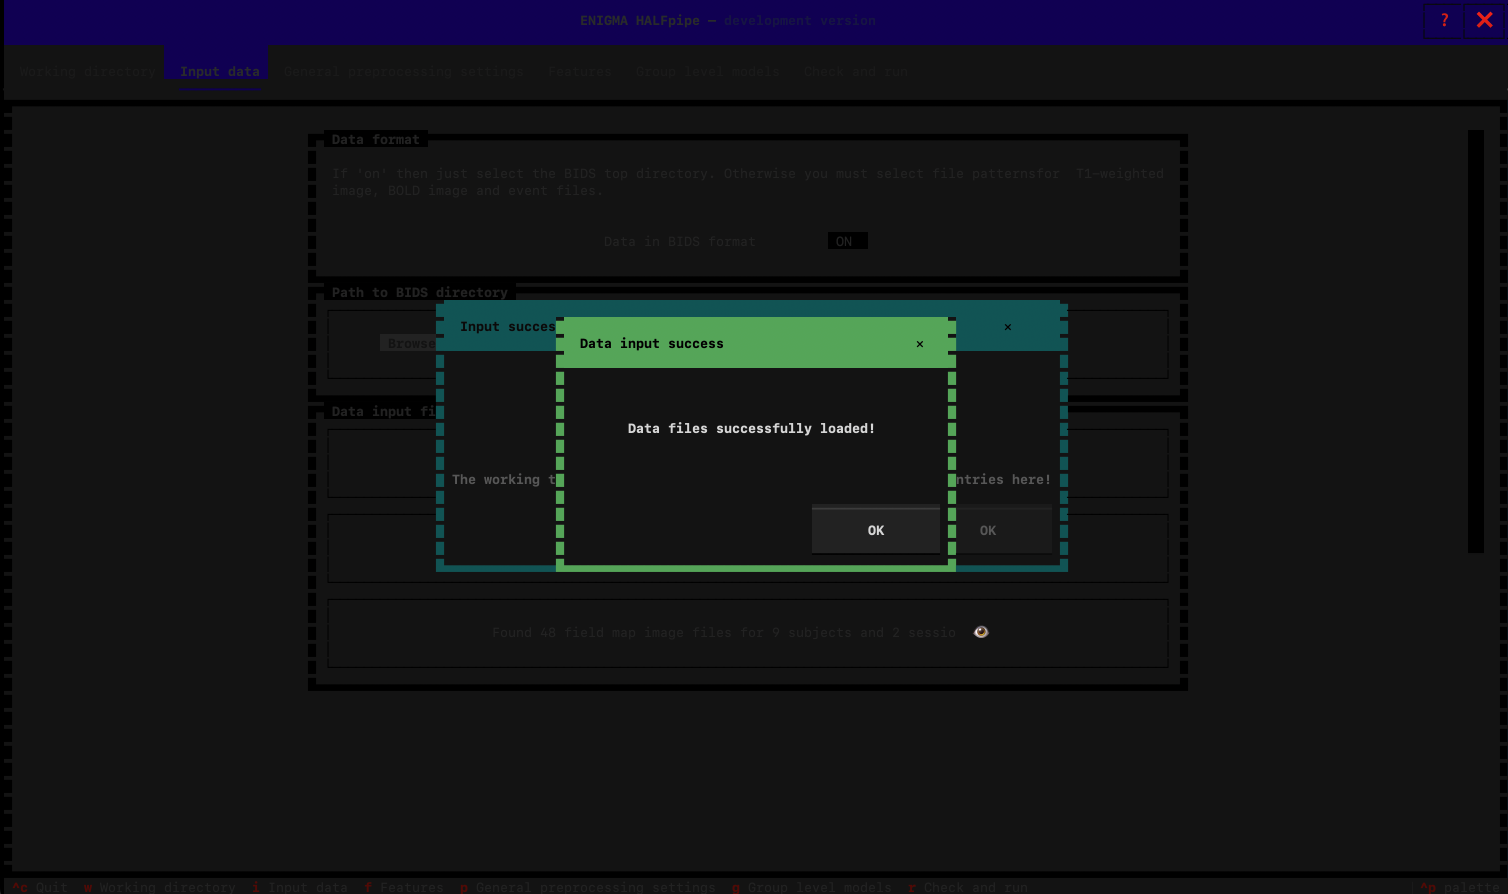
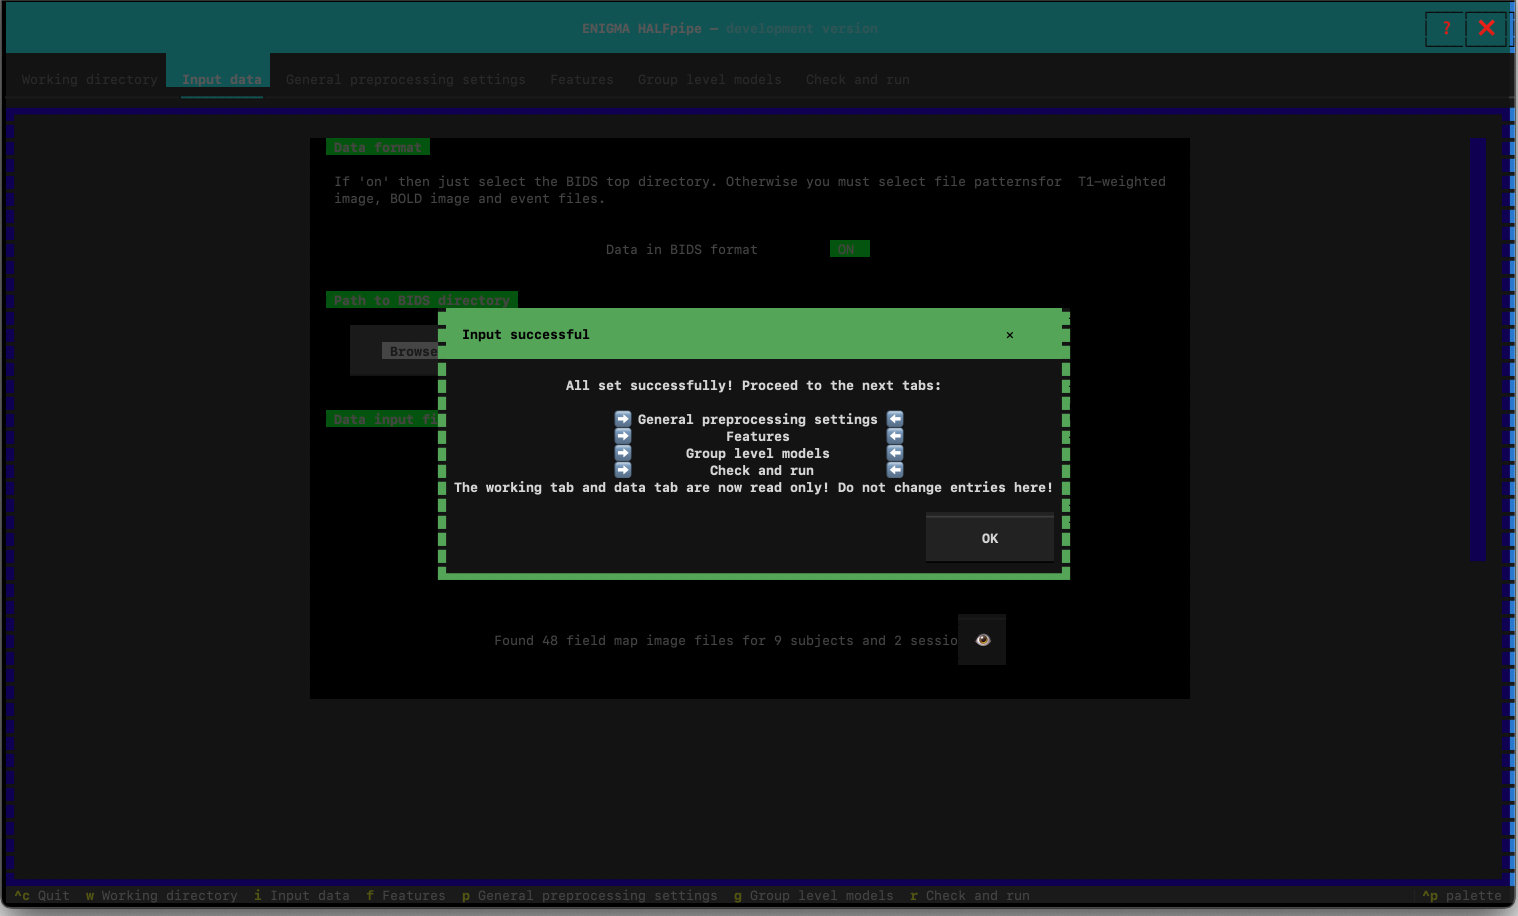
Verify all the files have been properly found. You can do that by looking at the number of file found. You can also click on the 👁️ to see the detail of the file.
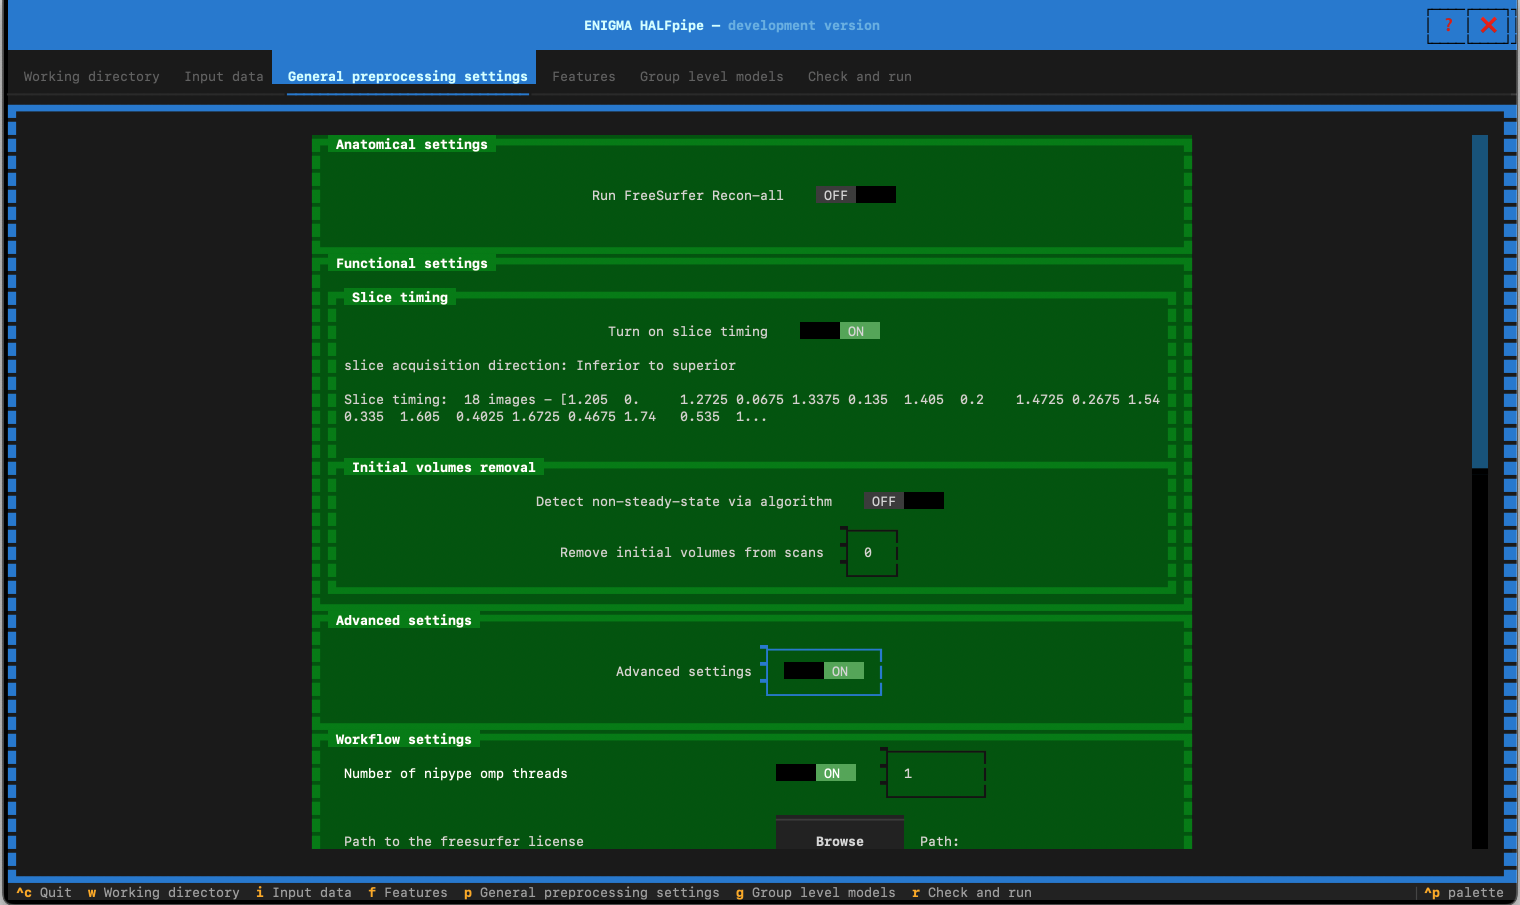
General Preprocessing settings
- Switch Slice timing to :
- ON if you know the slice timing details during the acquisition for your data. If unsure, check with the MR physicist/technician or any dataset information.
- In the following steps you will check the slice order and slice timing values.
- Check the metadata automatically found. Then click Yes if these are the expected numbers, otherwise No and specify them.
- OFF otherwise
- ON if you know the slice timing details during the acquisition for your data. If unsure, check with the MR physicist/technician or any dataset information.
- Switch Advanced setting to ON
- Switch “Generate workflow for running on a cluster” to ON
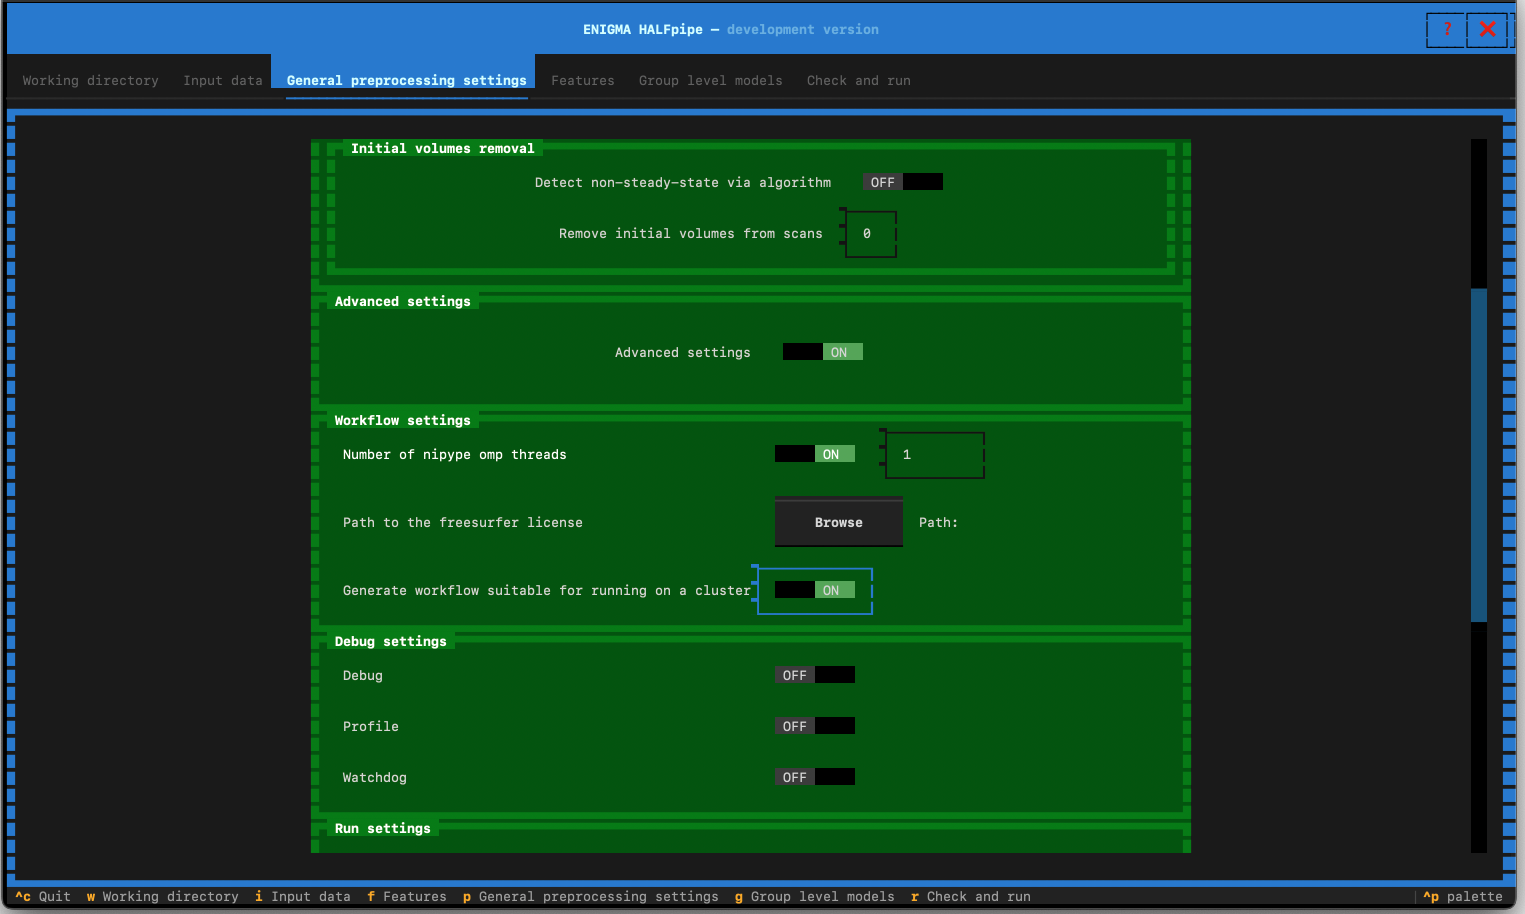
- Click on Features in the top navigation bar, and go to the next section.
Features
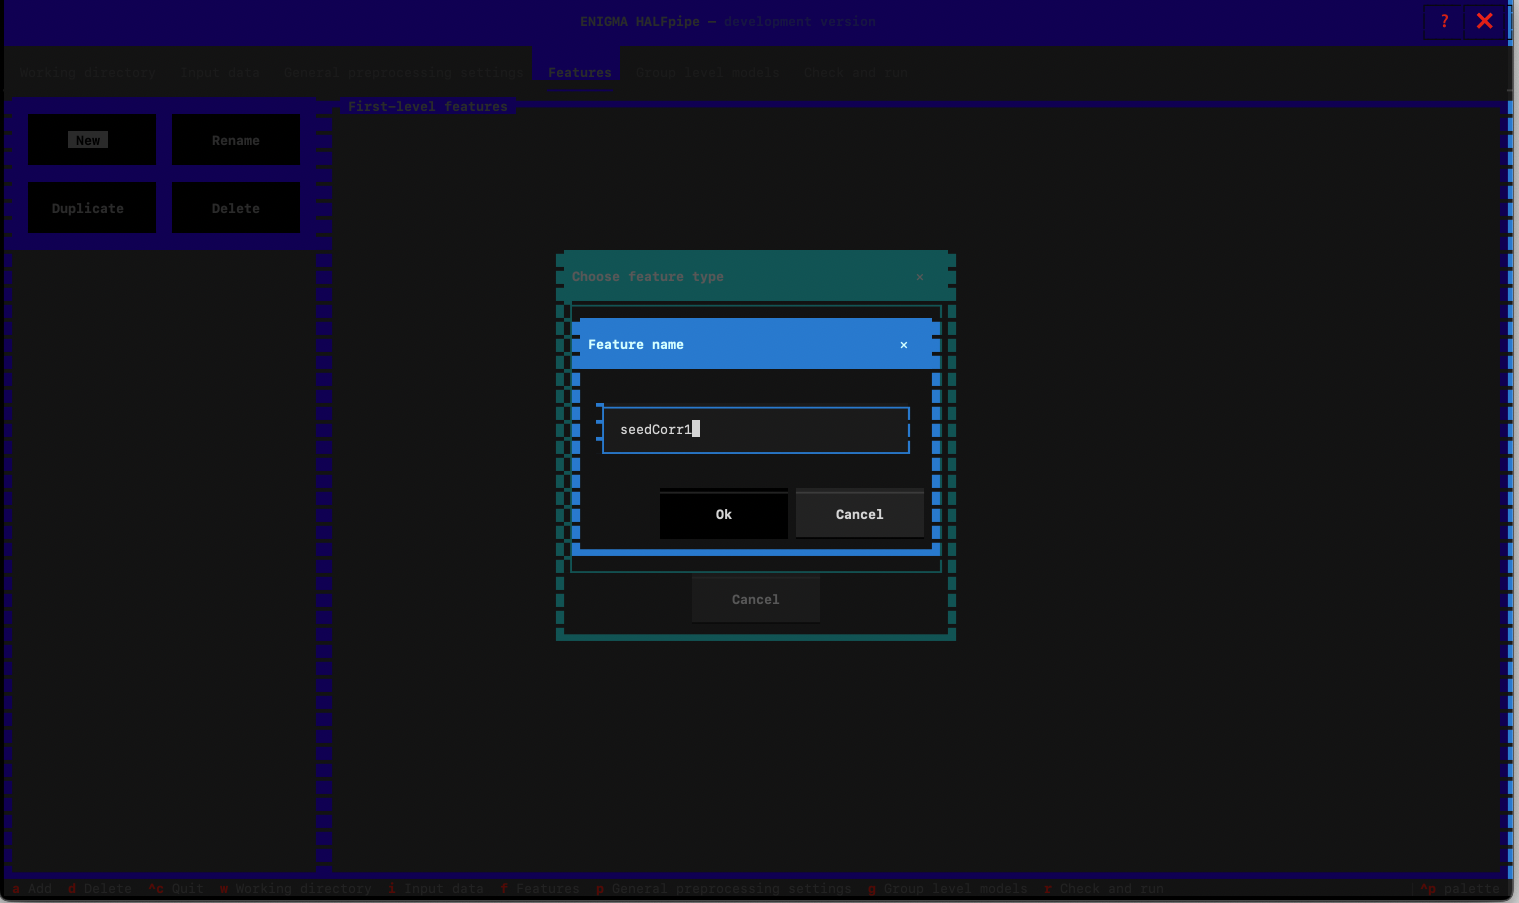
- Click on New
- We will now run 4 feature types: Seed-based connectivity, Atlas-based connectivity Matrix, ReHo and fALFF. Each of the features will be extracted with three types of confound removal using:
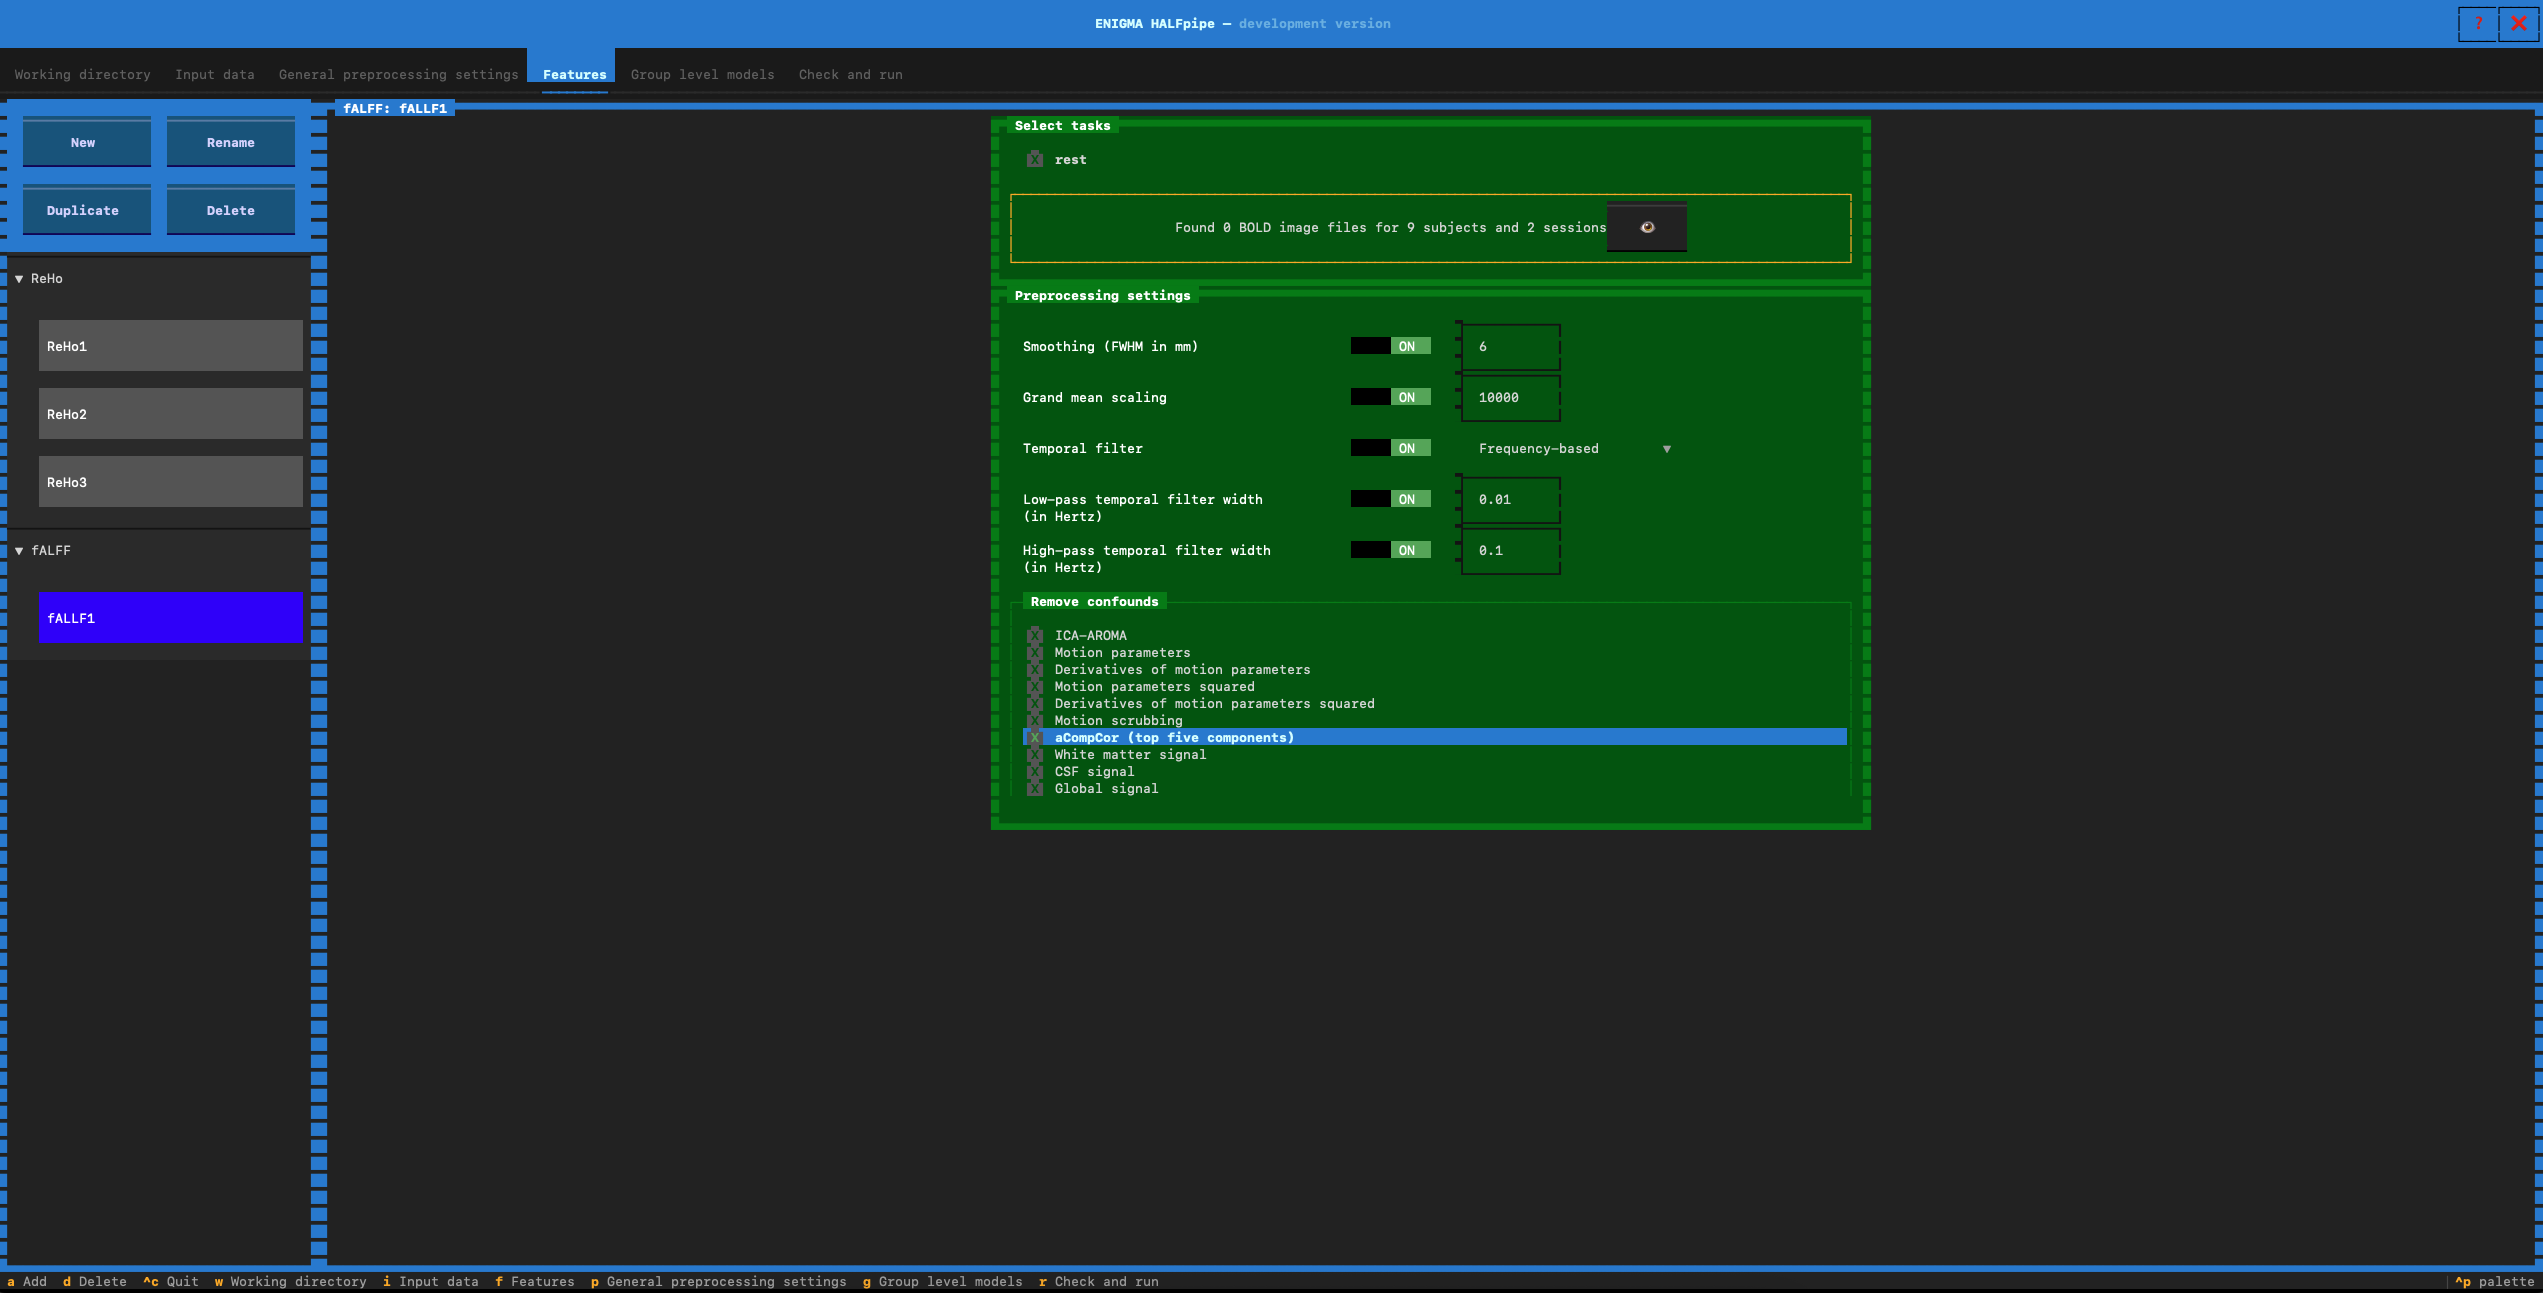
- Pipeline 1: aCompCor
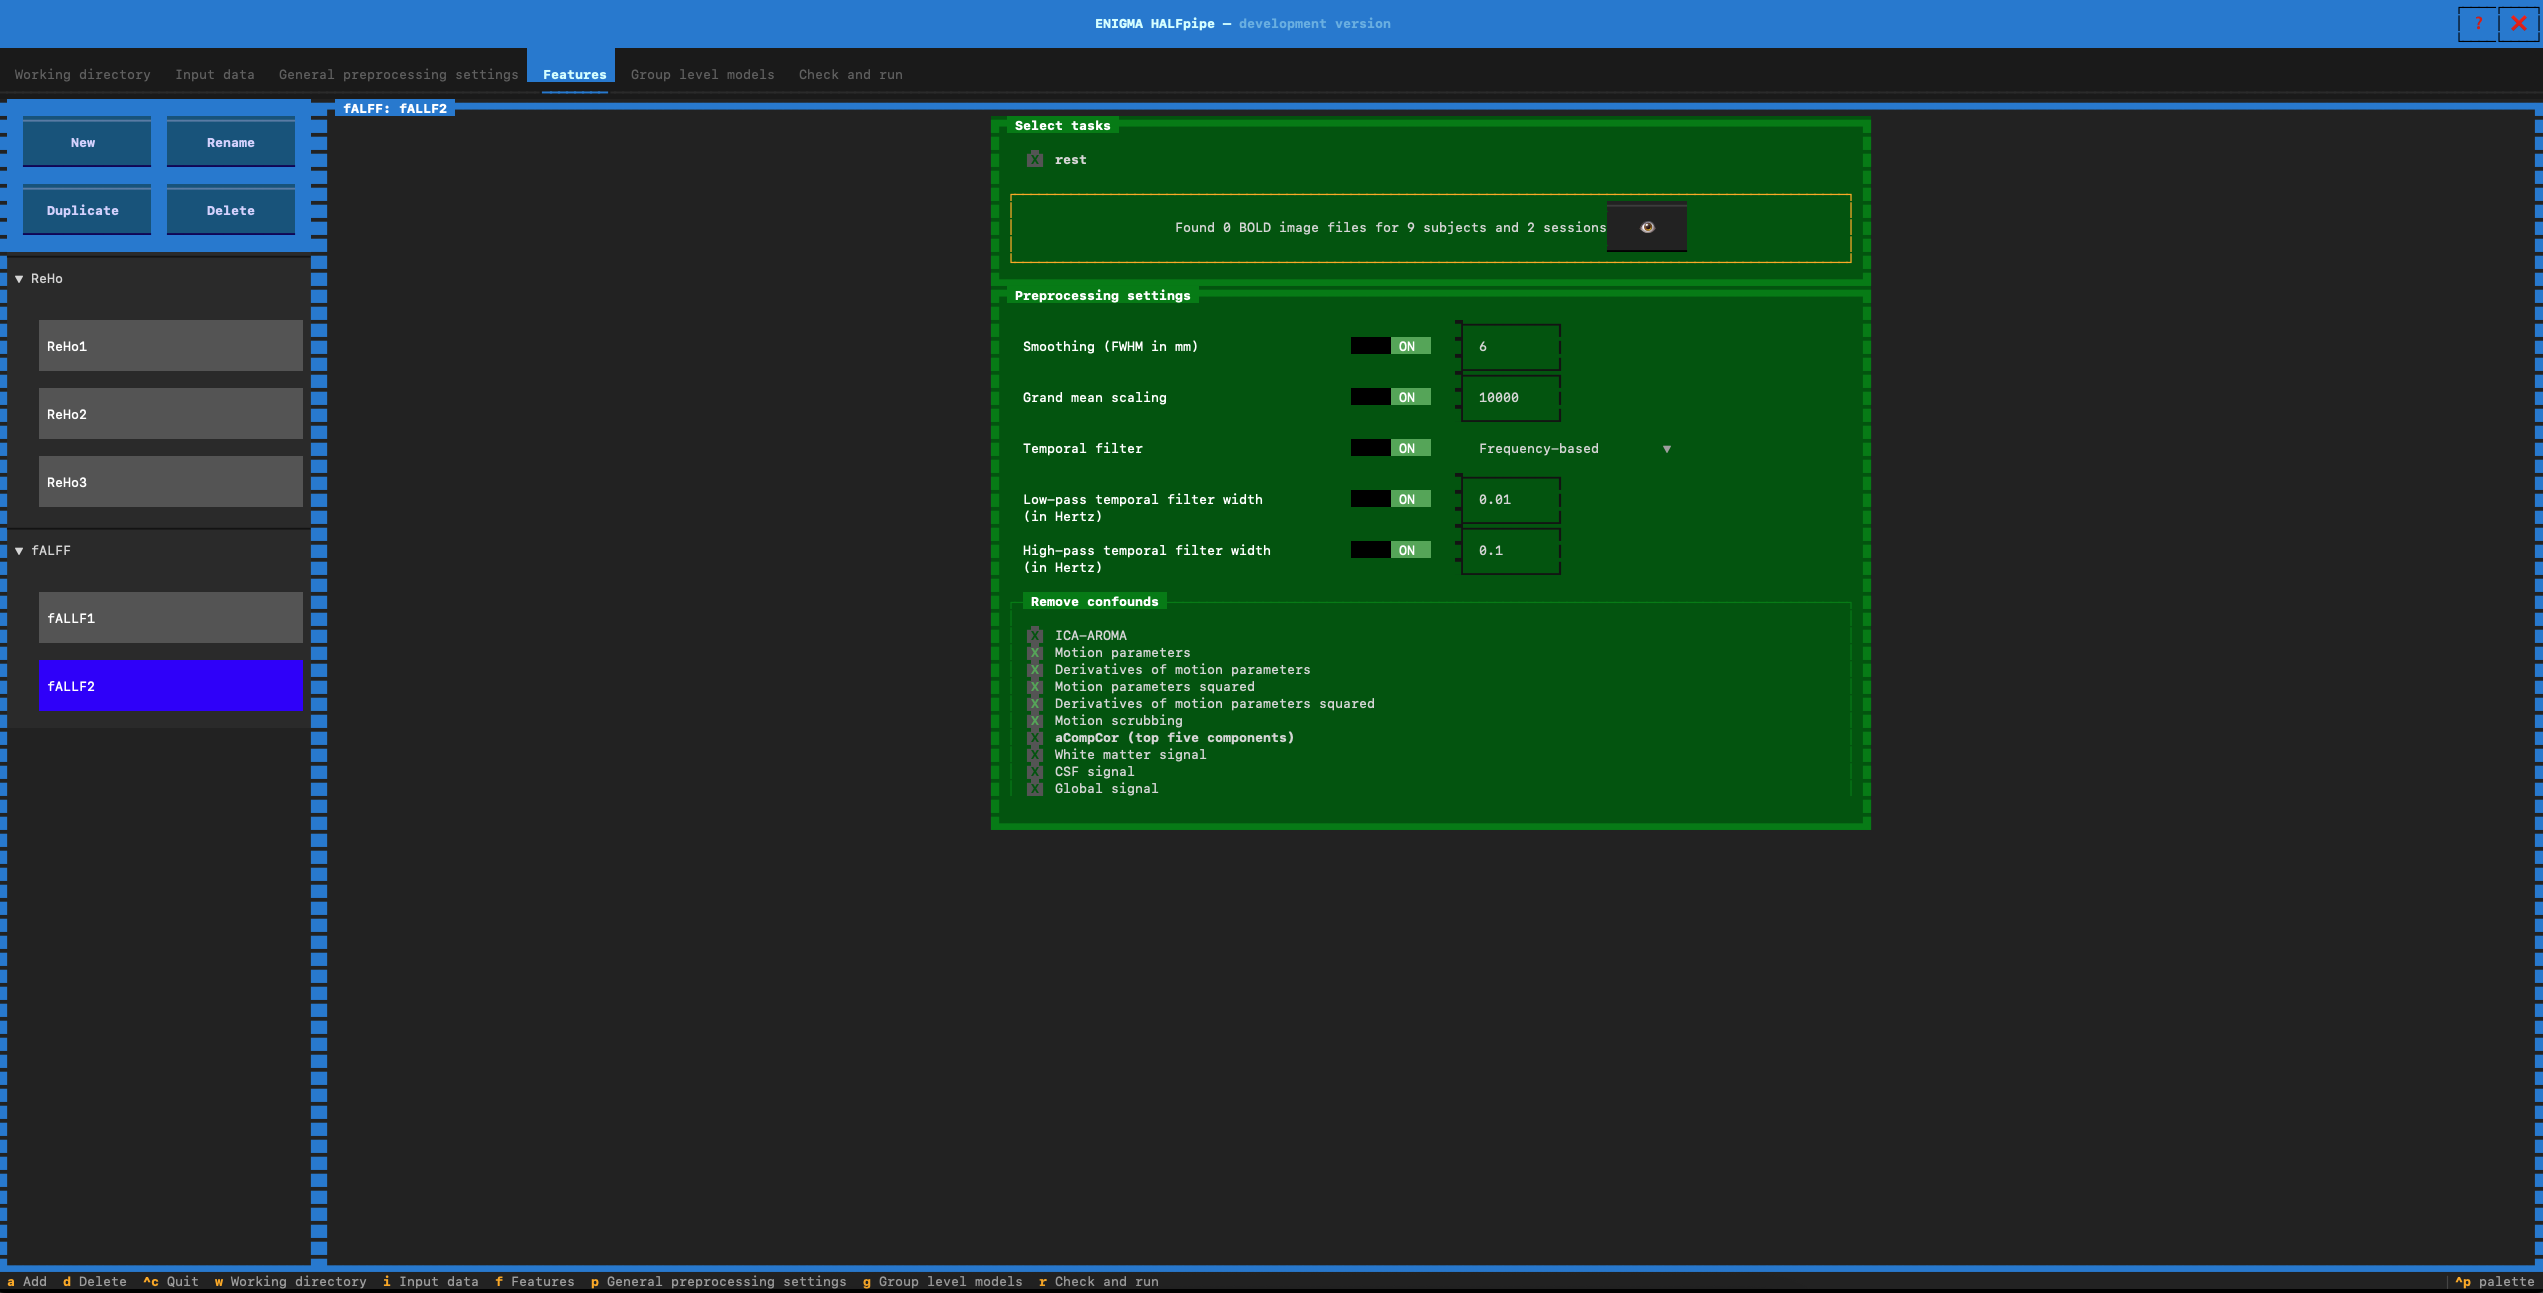
- Pipeline 2: Motion parameters with scrubbing
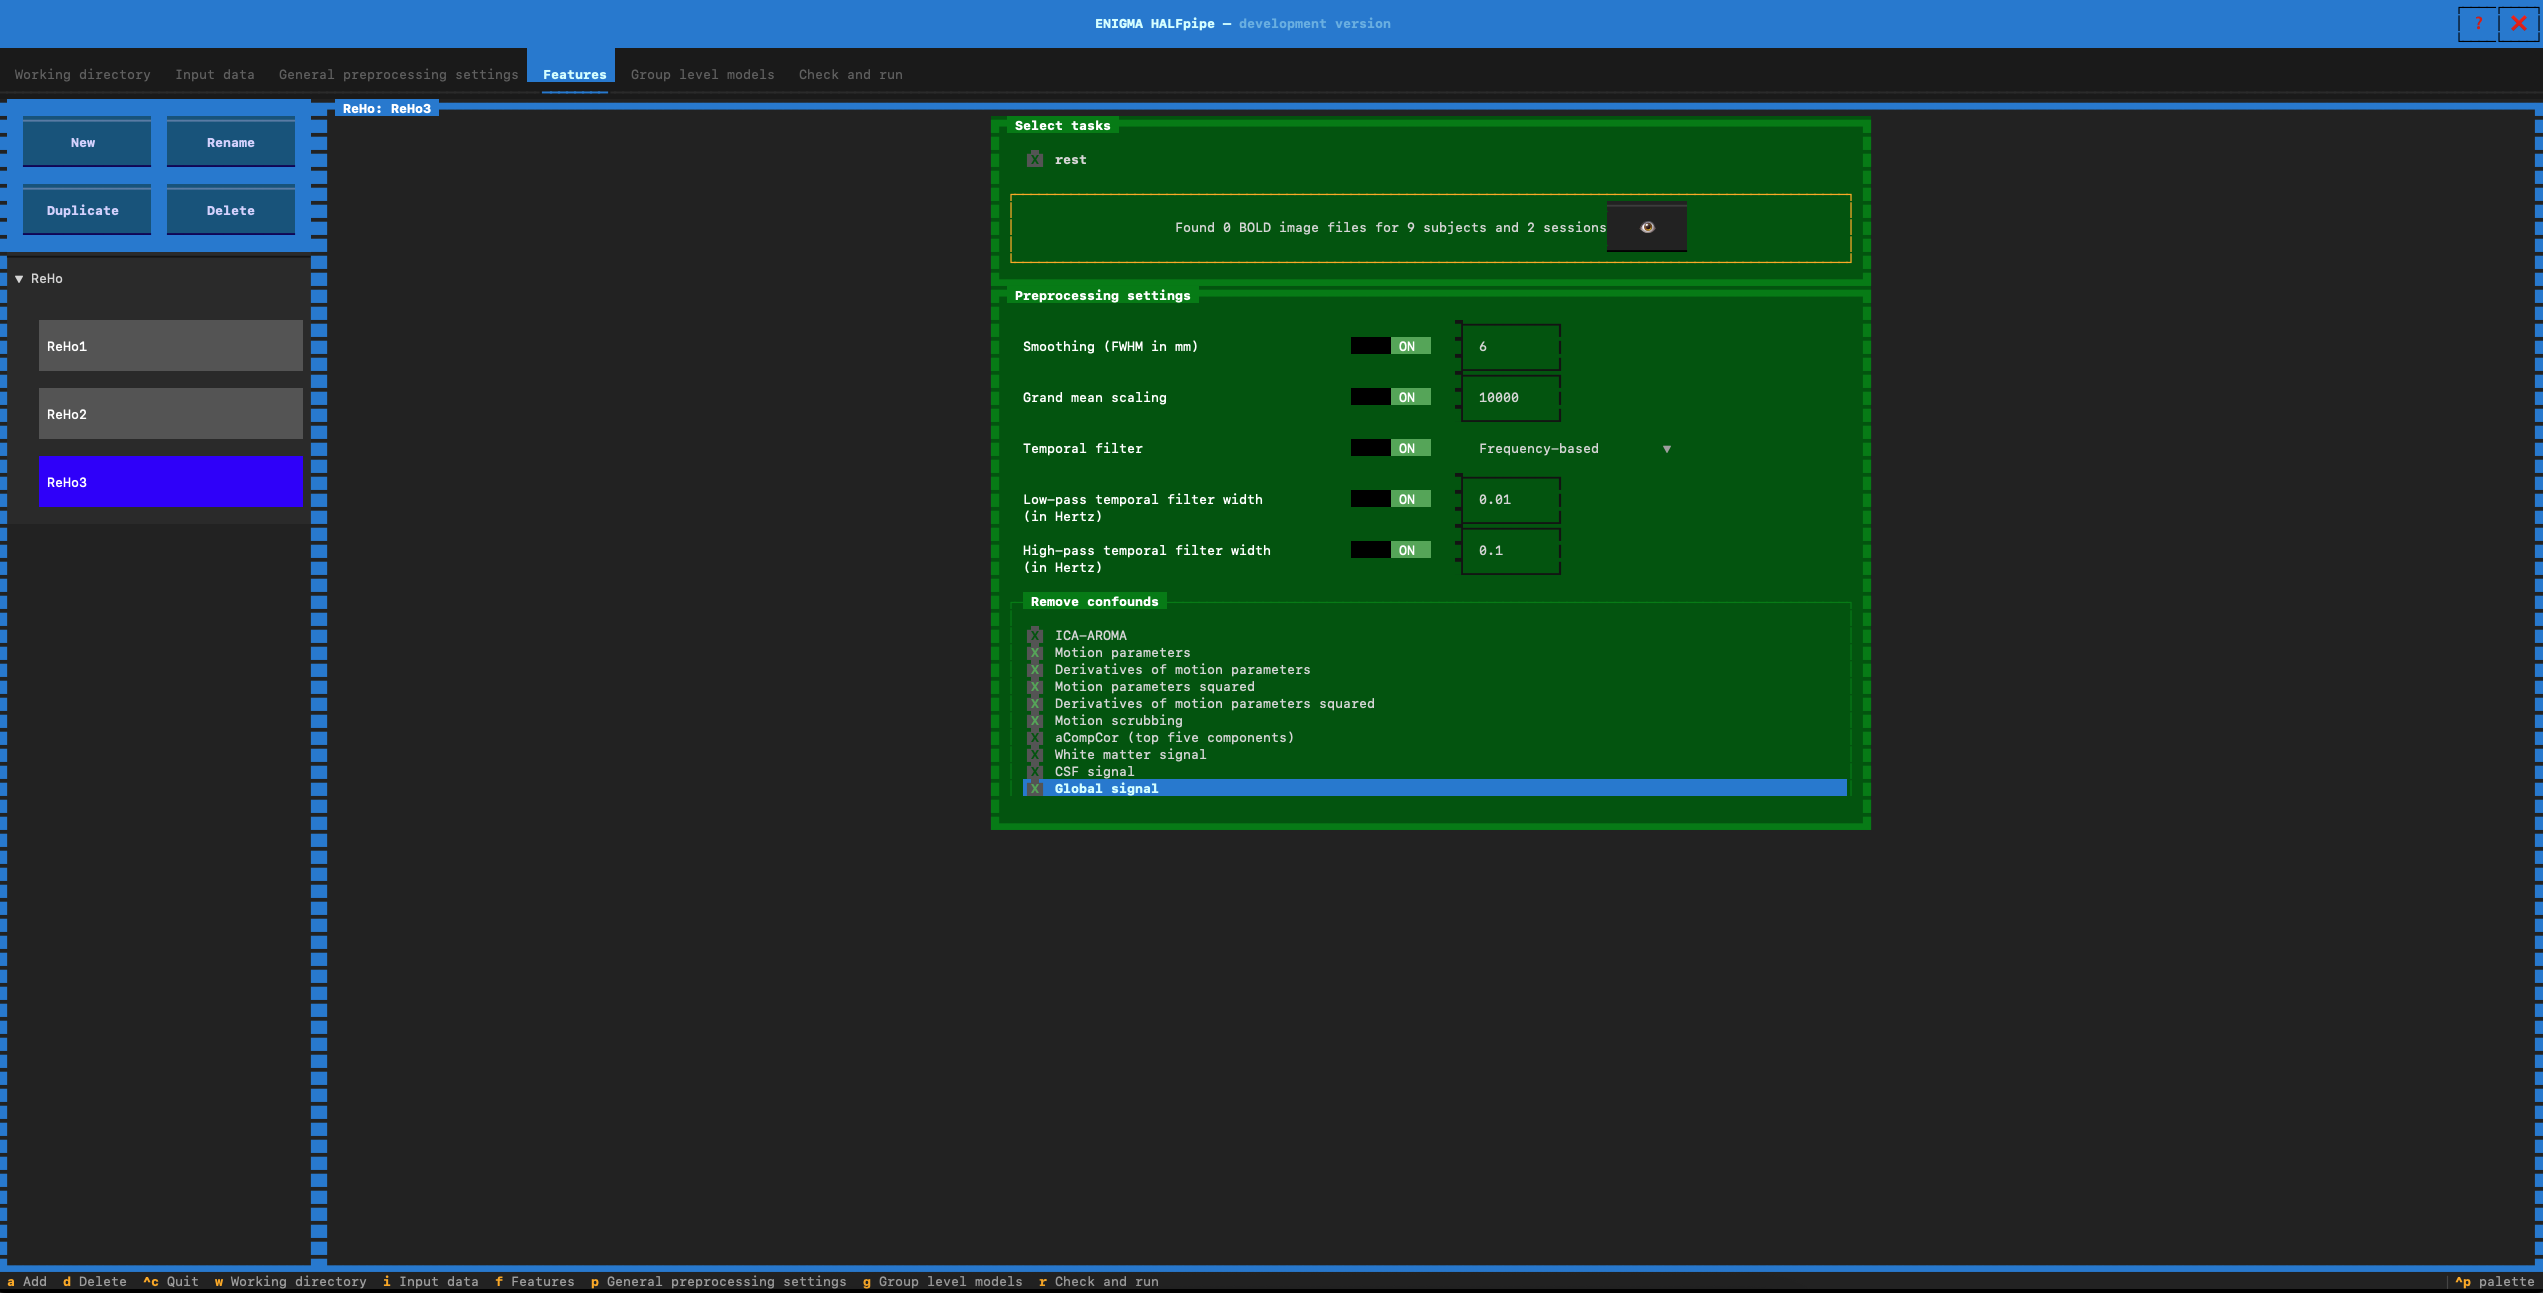
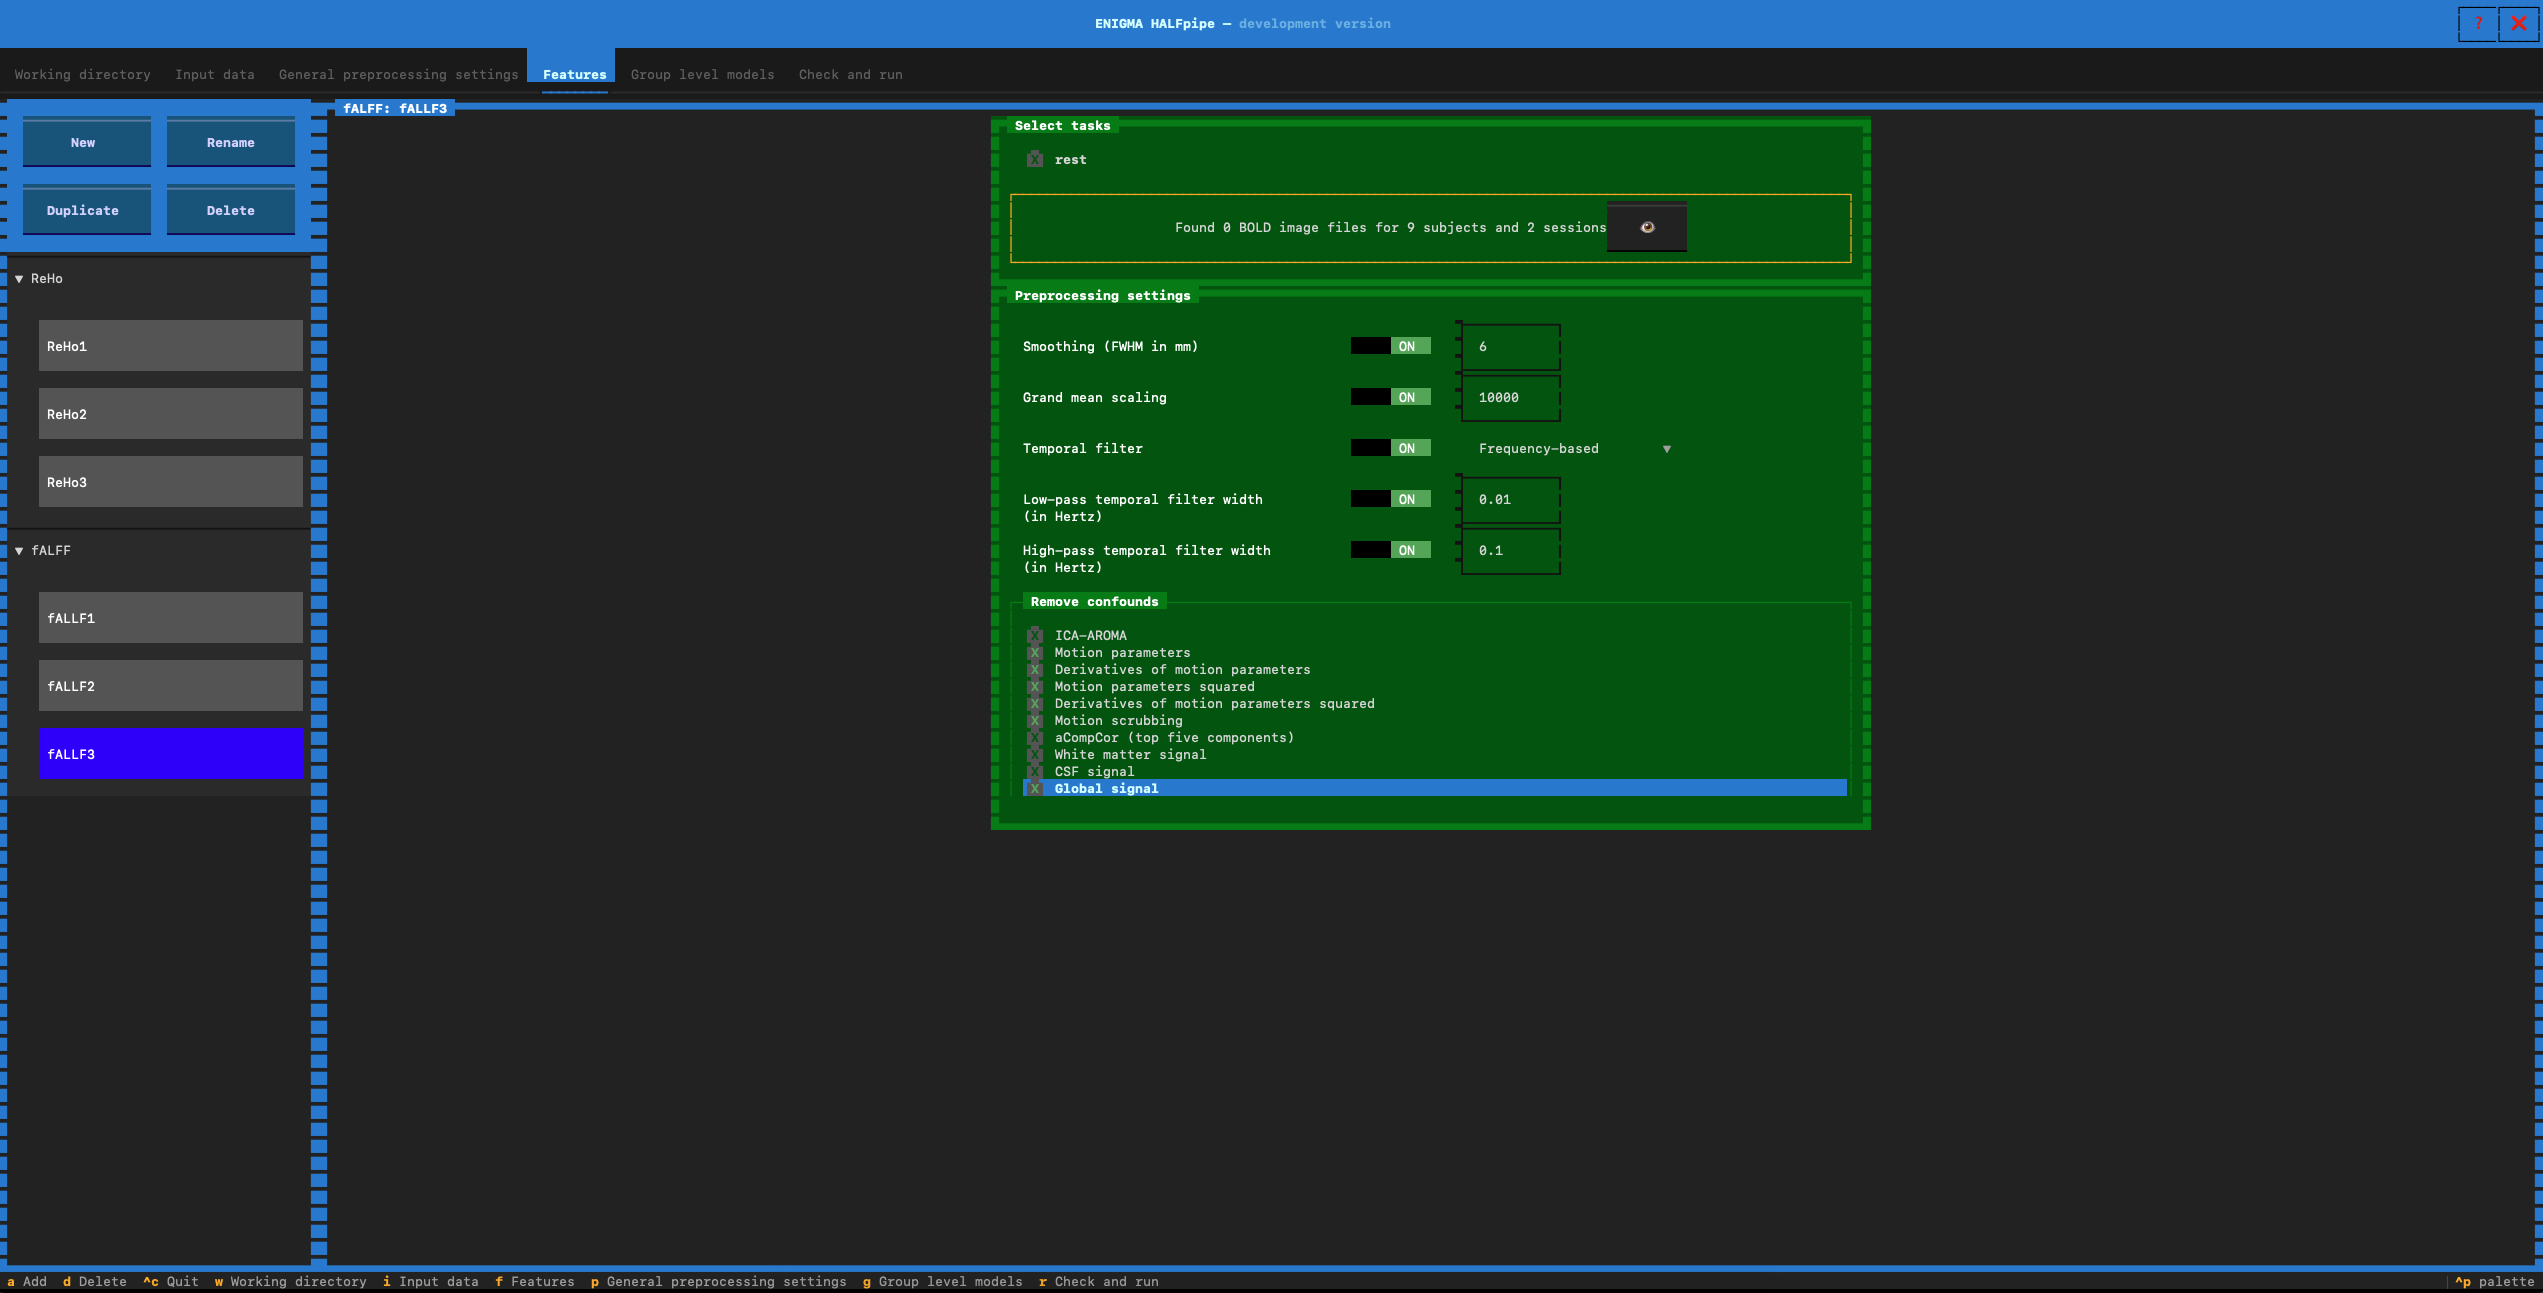
- Pipeline 3: Pipeline 2 + Global Signal (GSR)
Recommended for multiverse analyses (optional pipelines)
- Pipeline 4: Motion parameters
- Pipeline 5: Pipeline 4 + Global Signal (GSR)
- Navigate through the sections below one by one.
1. Seed-based connectivity
- Select Seed-based connectivity
- Feature name: Type seedCorr1
General settings
- Select task
- Click on the session(s) or task(s) corresponding to your resting state data.
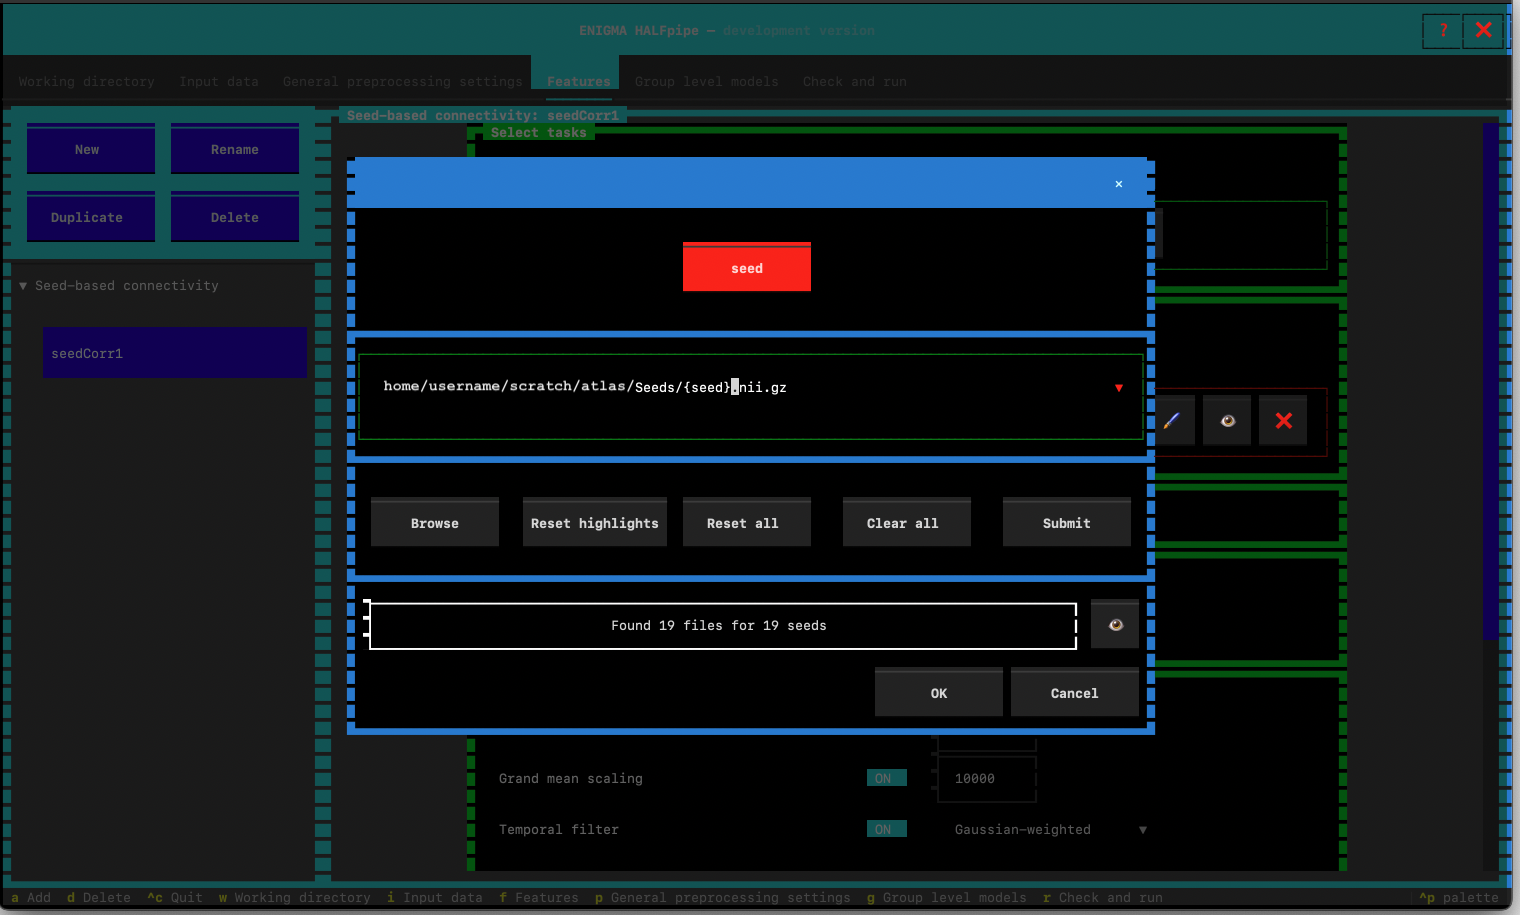
- Seed images
- Click on Add.
- Click on Browse to indicate the path.
- Select the path of one existing seed. Then modify the path with
{seed}.nii.gz - Proceed with these values: Yes. Then verify that all the seeds are selected.
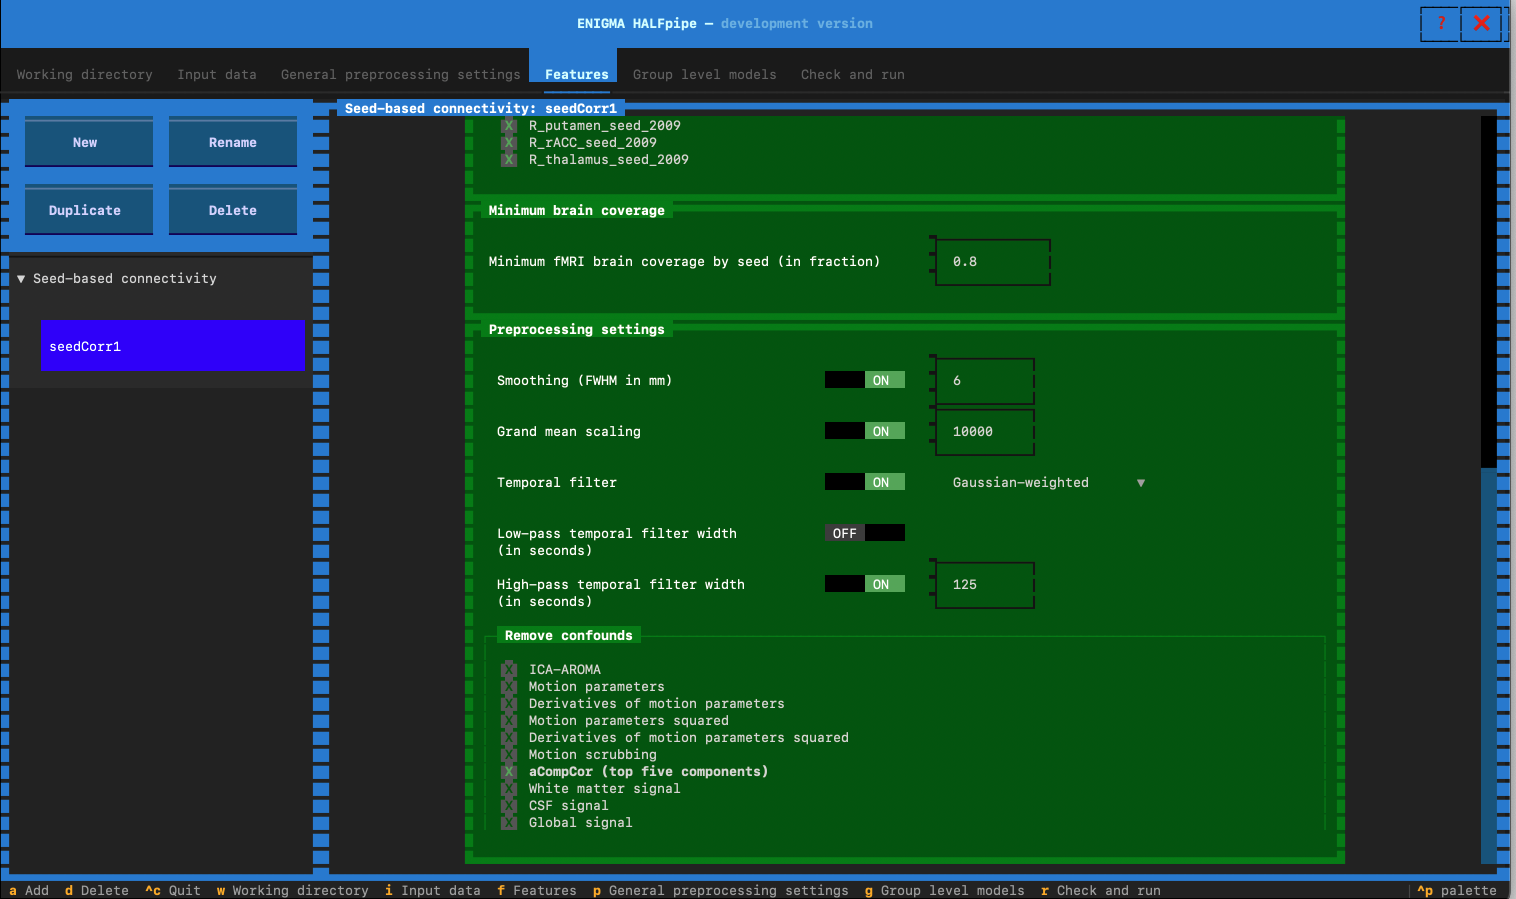
- Minimum brain coverage:
- Set minimum brain coverage to 0.5
- Preprocesssing settings
- Switch low-pass temporal filter to OFF
Remove confounds for 5 pipelines
- Pipeline 1: Select the confounds for Pipeline 1. Click on :
We will now repeat the same procedure for the other pipelines.
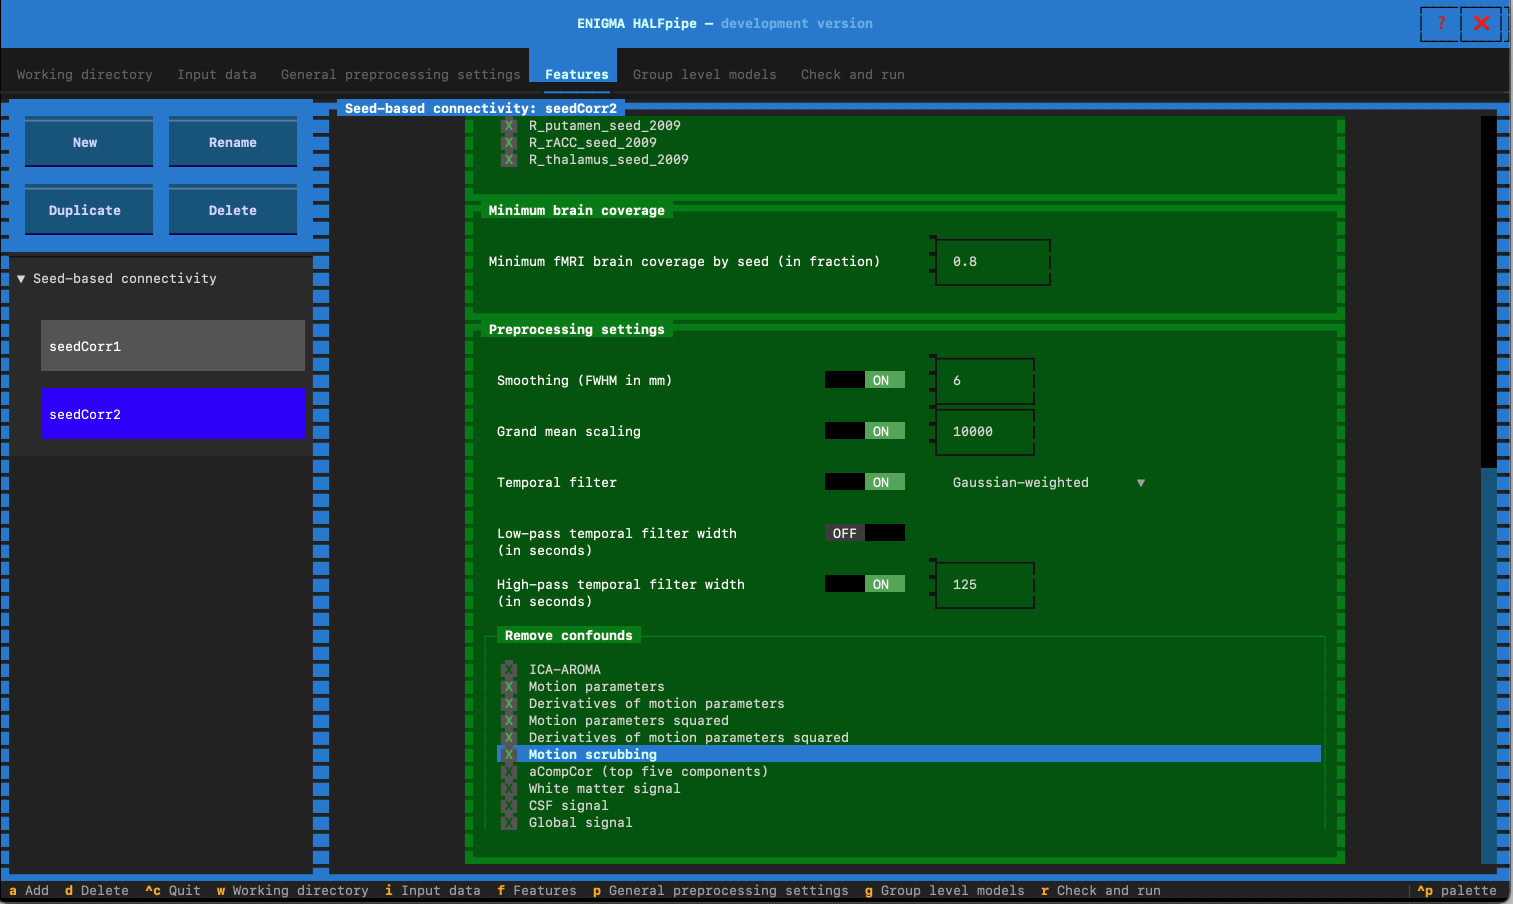
- Pipeline 2:
- To do so, click Duplicate in the left navigation bar (located below the New button). This will create a new panel for seed-based connectivity, automatically pre-filled with the general settings.
- Feature name: Enter seedCorr2
- In preprocesssing settings: Switch low-pass temporal filter to OFF
- Go to the Remove confounds section and select the confounds for Pipeline 2:
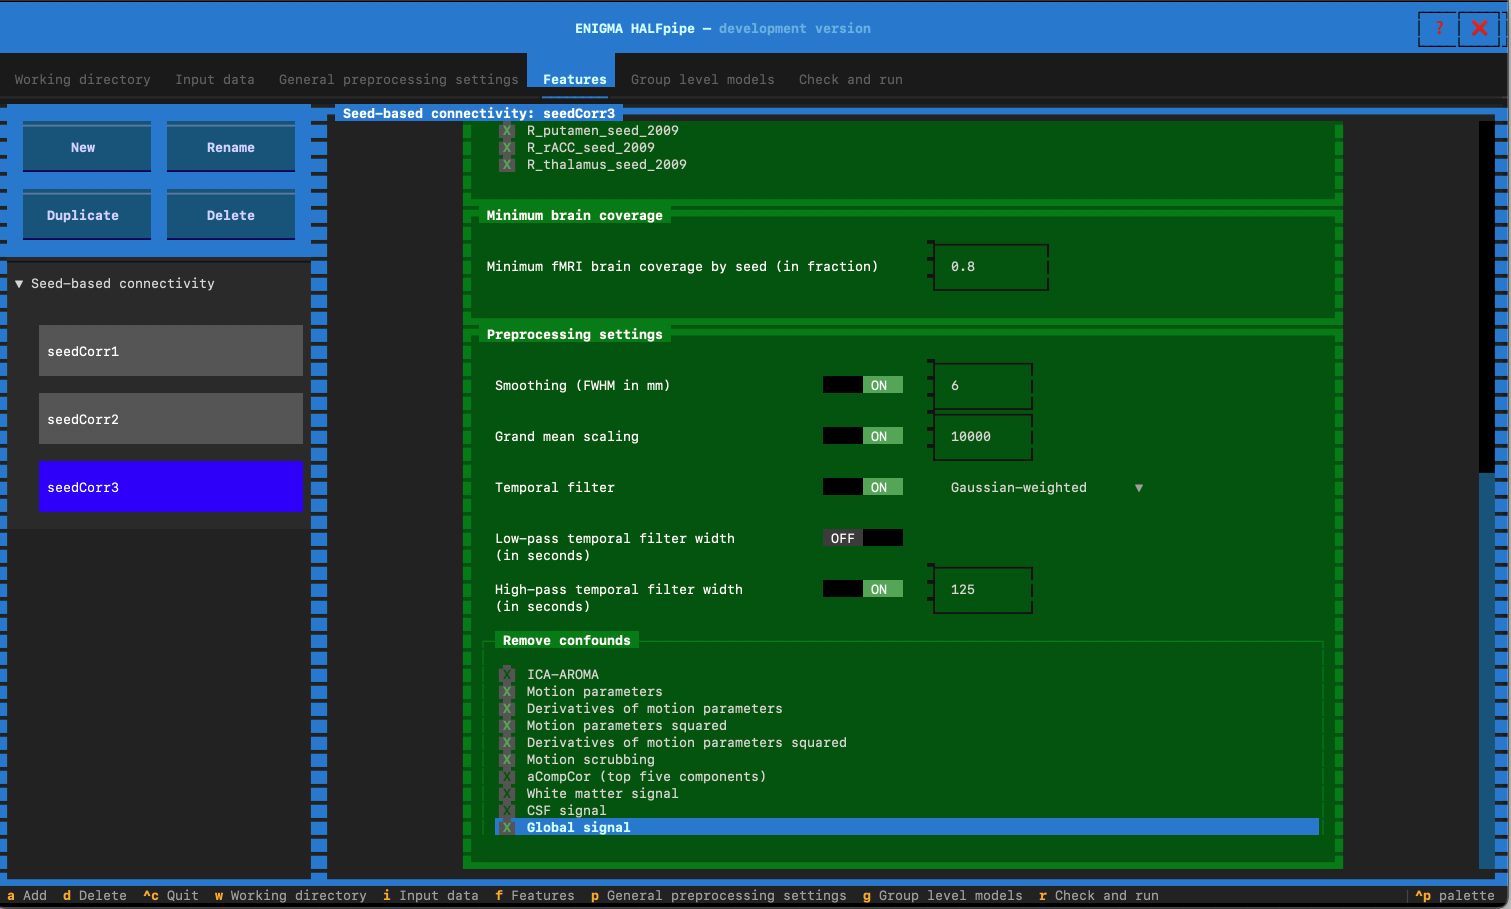
- Pipeline 3:
- click Duplicate in the left navigation bar.
- Feature name: Enter seedCorr3
- In preprocesssing settings: Switch low-pass temporal filter to OFF
- Select the confounds for Pipeline 3:
- Pipeline 4:
- Again, click Duplicate in the left navigation bar.
- Feature name: Enter seedCorr4
- In preprocesssing settings: Switch low-pass temporal filter to OFF
- Select the confounds for Pipeline 4:
✅ Motion parameters
✅ Derivatives of motion parameters
✅ Motion parameters squared
✅ Derivatives of motion parameters squared
- Pipeline 5:
- Again, click Duplicate in the left navigation bar.
- Feature name: Enter seedCorr5
- In preprocesssing settings: Switch low-pass temporal filter to OFF
- Select the confounds for Pipeline 5:
✅ Motion parameters
✅ Derivatives of motion parameters
✅ Motion parameters squared
✅ Derivatives of motion parameters squared
✅ Global signal
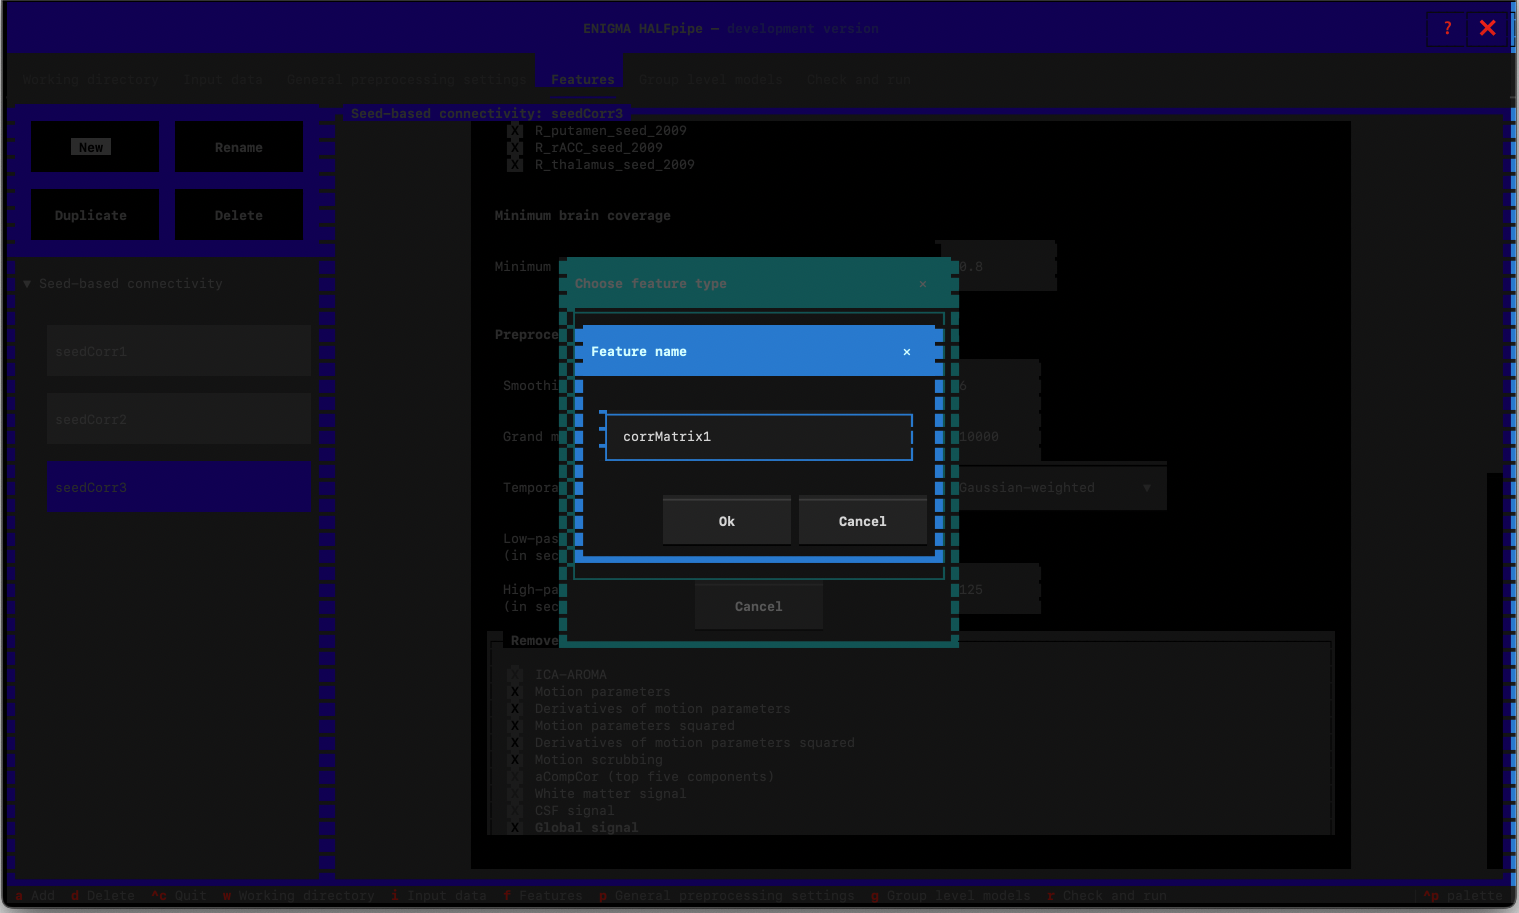
- Once you are done with all the pipeline, click on New in the left navigation bar and go to the next Feature section.
2. Atlas-based connectivity Matrix
- Select Atlas-based connectivity matrix
- Feature name: Type corrMatrix1
General settings
- Select task
- If applicable select session(s) or task(s) for resting state data
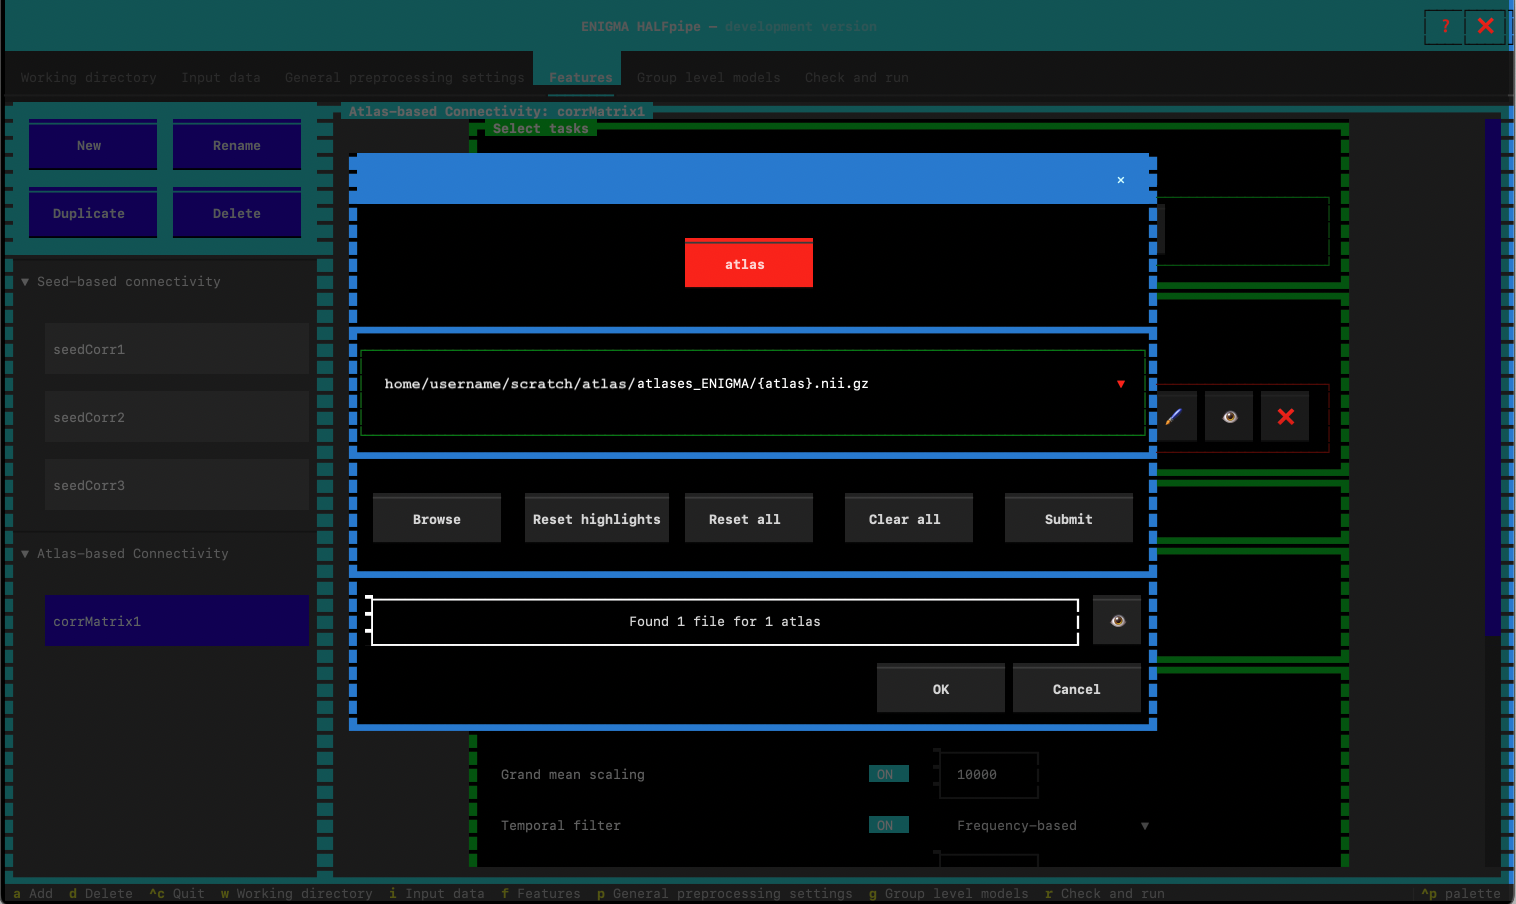
- Atlas images
- Add path to atlas images. Click on Browse to indicate the path.
- Select one existing atlas. Then modify the path with
{atlas}.nii.gz - Proceed with these values: yes.
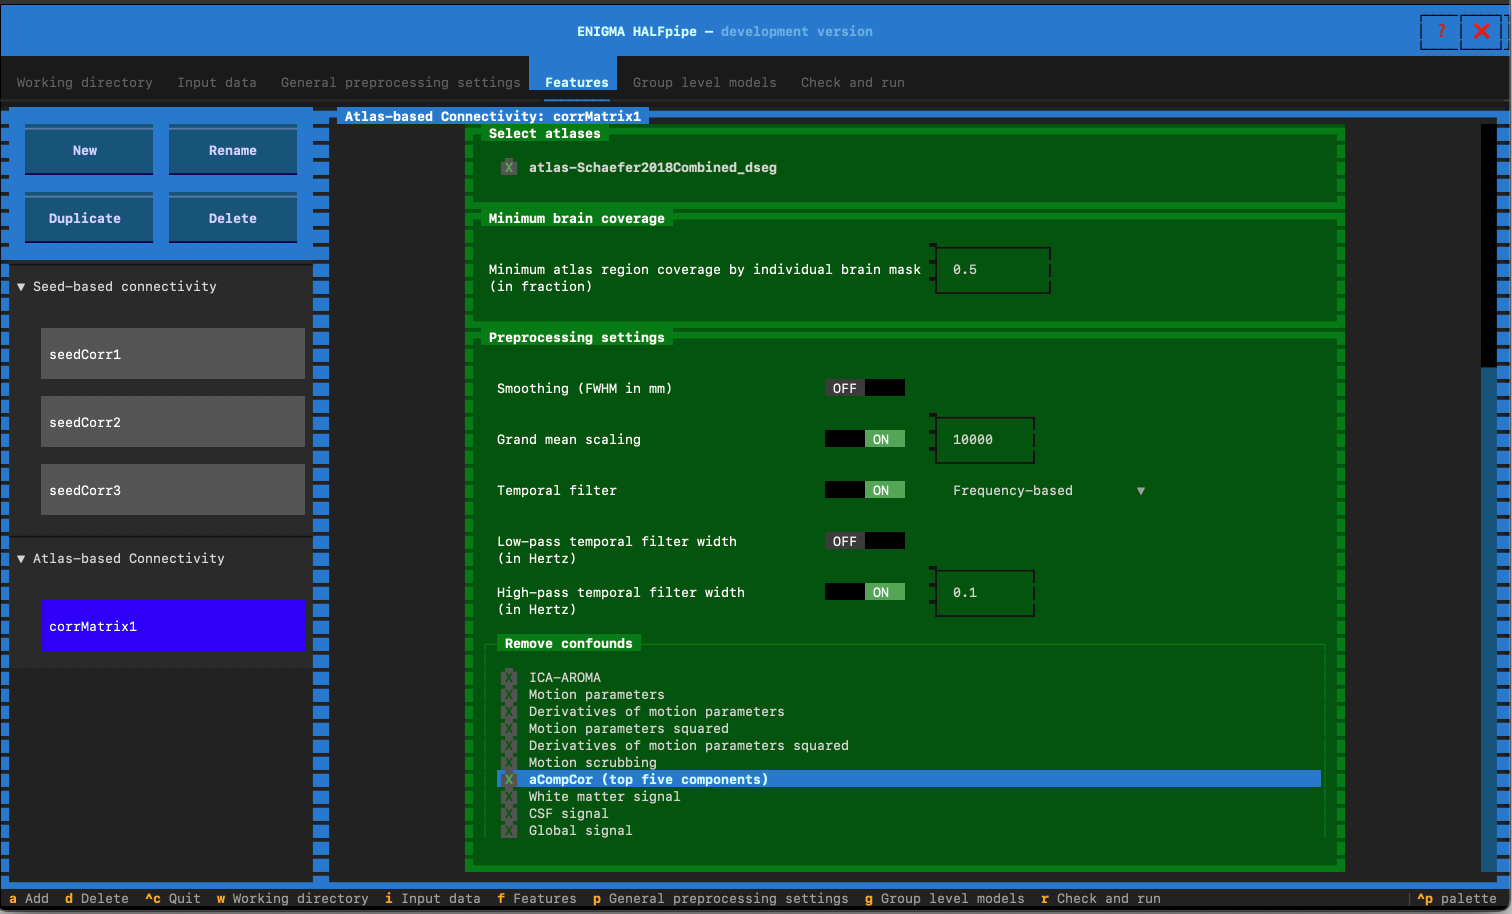
- Then only select
atlas-Schaefer2018Combined_dseg.nii.gz.
- Minimum brain coverage:
- Set to 0.5
- Preprocesssing settings
- Switch low-pass temporal filter width to OFF
Remove confounds for 5 pipelines
- Pipeline 1: Select the confounds for Pipeline 1. Click on :
We will now repeat the same procedure for the other pipelines.
- Pipeline 2:
- To do so, click Duplicate in the left navigation bar (located below the New button). This will create a new panel for seed-based connectivity, automatically pre-filled with the general settings.
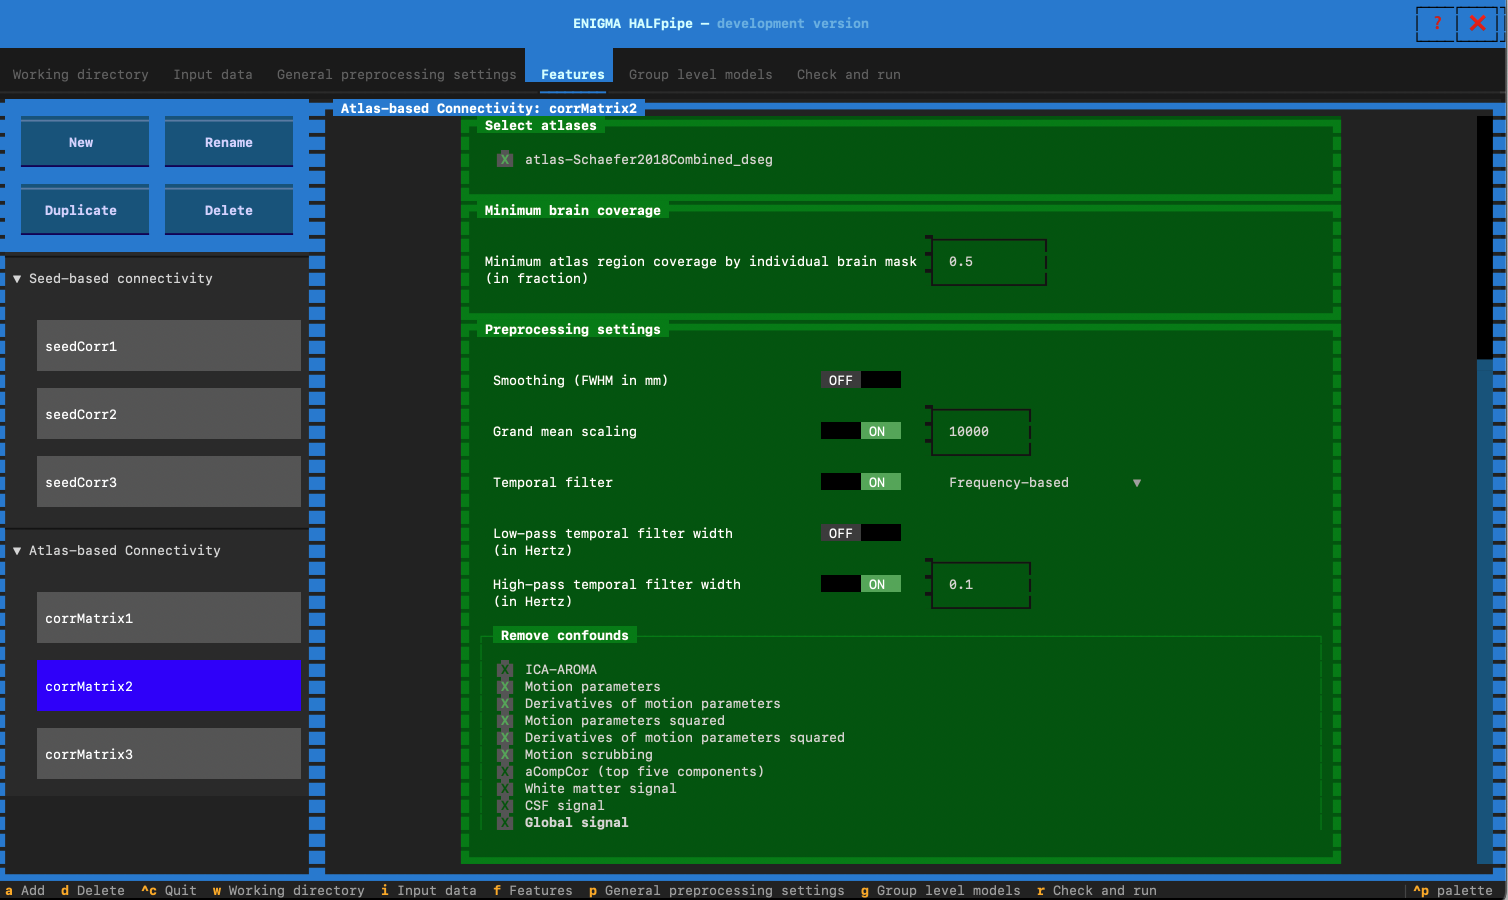
- Feature name: Enter corrMatrix2
- In preprocesssing settings: Switch low-pass temporal filter to OFF
- Go to the Remove confounds section and select the confounds for Pipeline 2:
- Pipeline 3:
- click Duplicate in the left navigation bar.
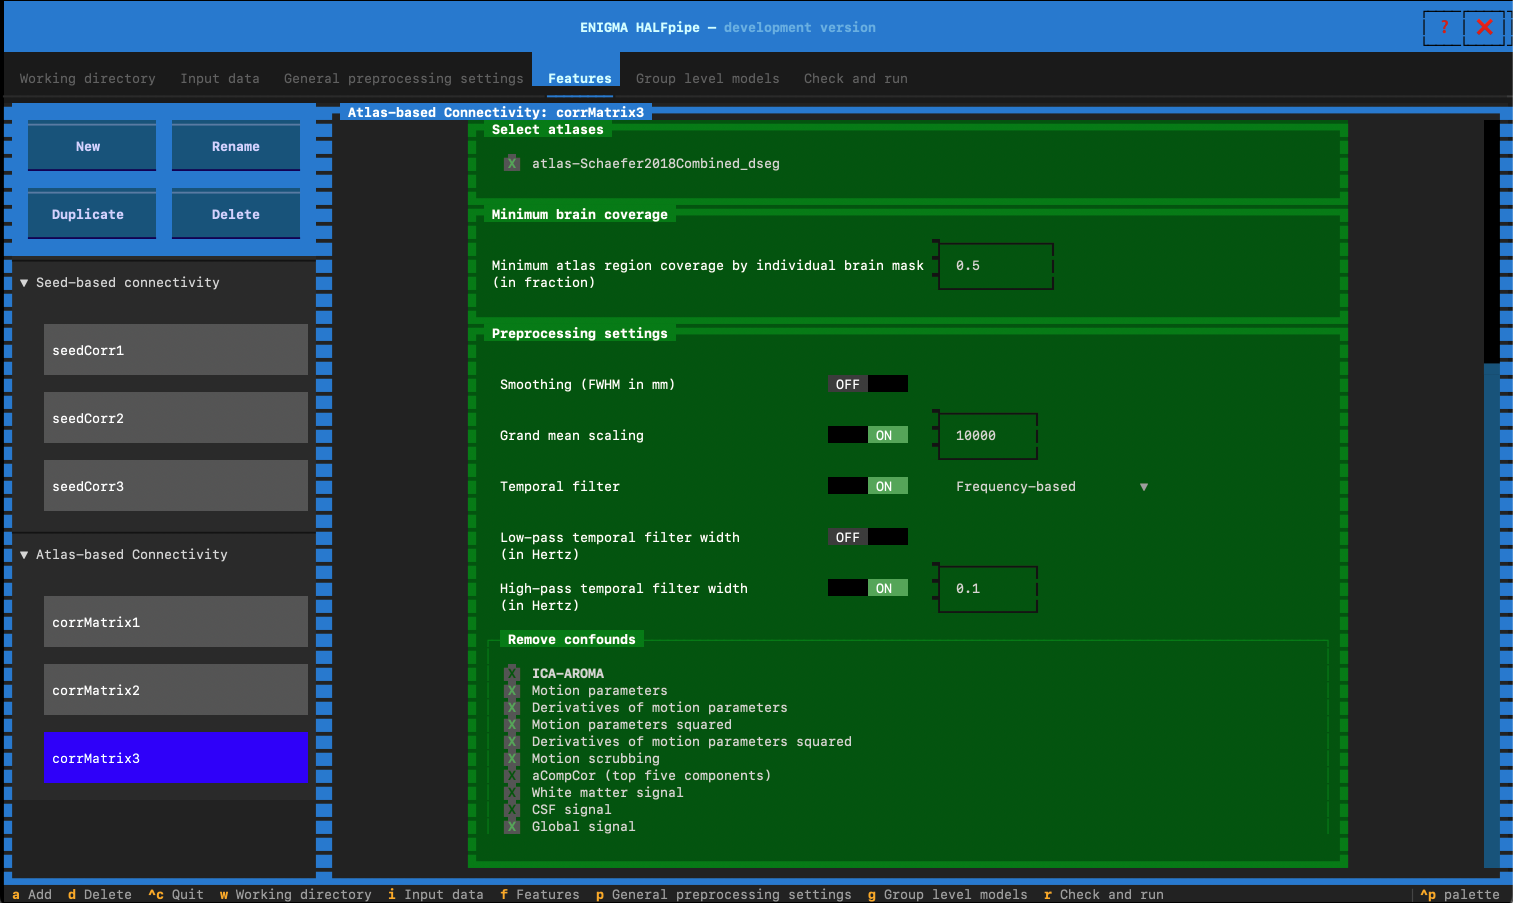
- Feature name: Enter corrMatrix3
- In preprocesssing settings: Switch low-pass temporal filter to OFF
- Select the confounds for Pipeline 3:
- Pipeline 4:
- Again, click Duplicate in the left navigation bar.
- Feature name: Enter corrMatrix4
- In preprocesssing settings: Switch low-pass temporal filter to OFF
- Select the confounds for Pipeline 4:
✅ Motion parameters
✅ Derivatives of motion parameters
✅ Motion parameters squared
✅ Derivatives of motion parameters squared
- Pipeline 5:
- Again, click Duplicate in the left navigation bar.
- Feature name: Enter corrMatrix5
- In preprocesssing settings: Switch low-pass temporal filter to OFF
- Select the confounds for Pipeline 5:
✅ Motion parameters
✅ Derivatives of motion parameters
✅ Motion parameters squared
✅ Derivatives of motion parameters squared
✅ Global signal
- Once you are done with all the pipeline, click on New in the left navigation bar and go to the next Feature section.
3. ReHo
- Select ReHo
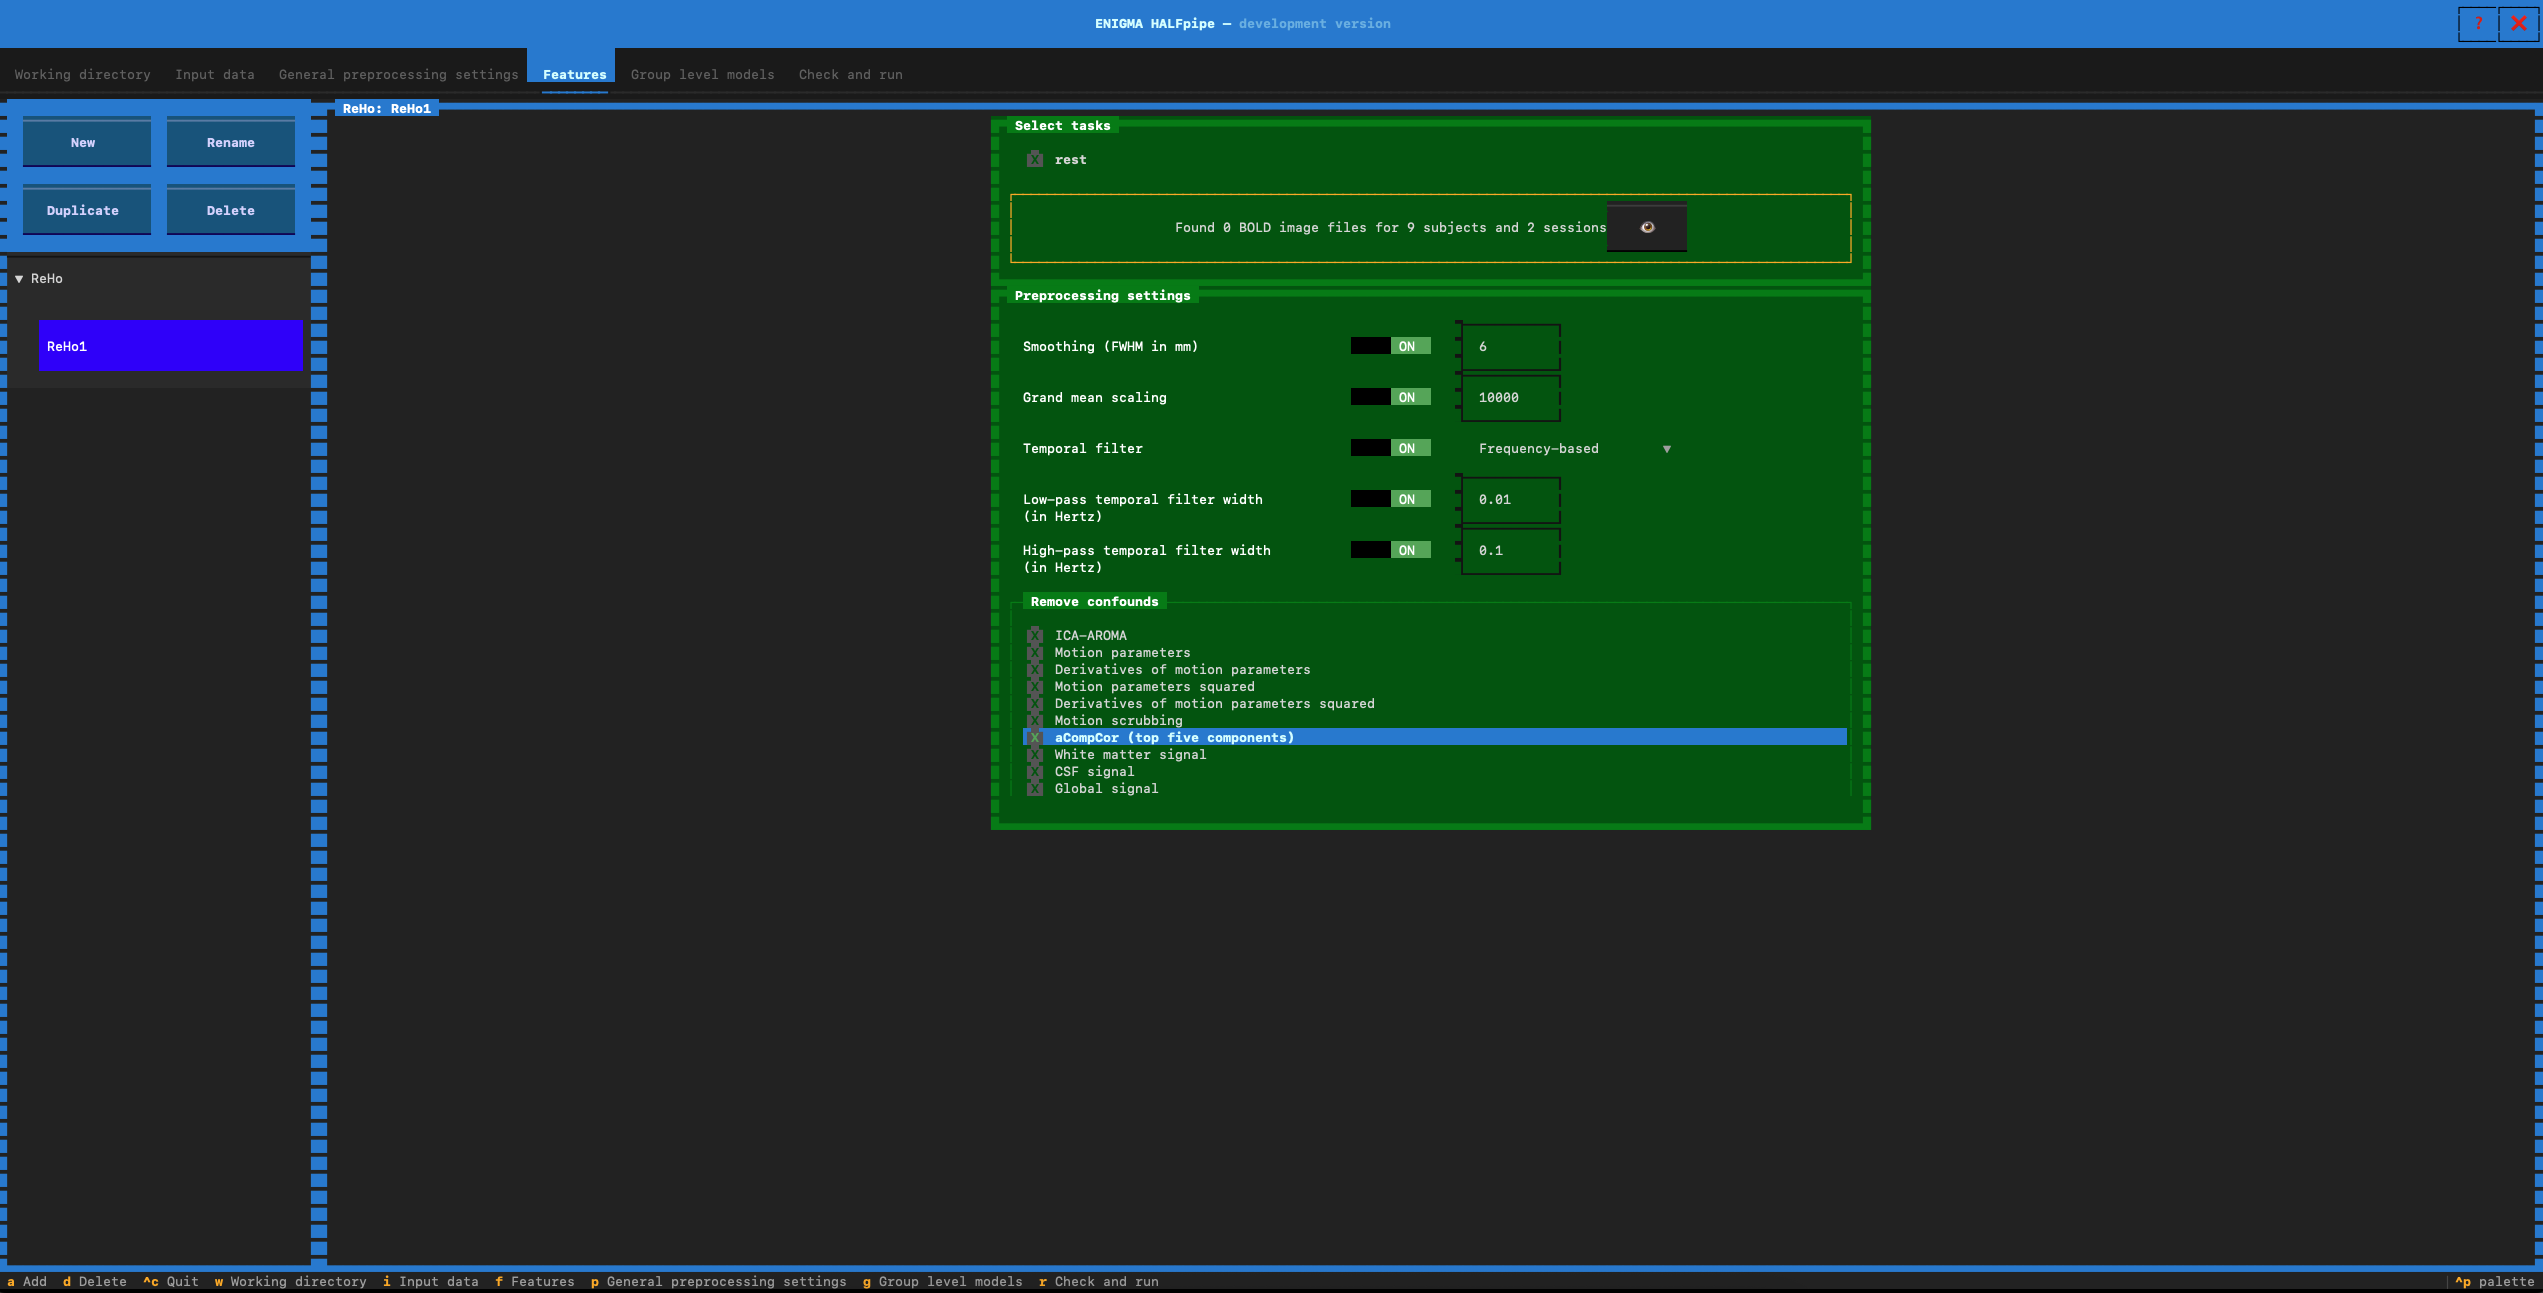
- Feature name: Type reHo1
General settings
- Select task
- If applicable select session(s) or task(s) for resting state data
- Preprocessing settings
- Verify that low-pass temporal filter is set to ON (0.01)
Remove confounds for 5 pipelines
- Pipeline 1: Select the confounds for Pipeline 1. Click on :
We will now repeat the same procedure for the other pipelines.
- Pipeline 2:
- To do so, click Duplicate in the left navigation bar (located below the New button). This will create a new panel for seed-based connectivity, automatically pre-filled with the general settings.
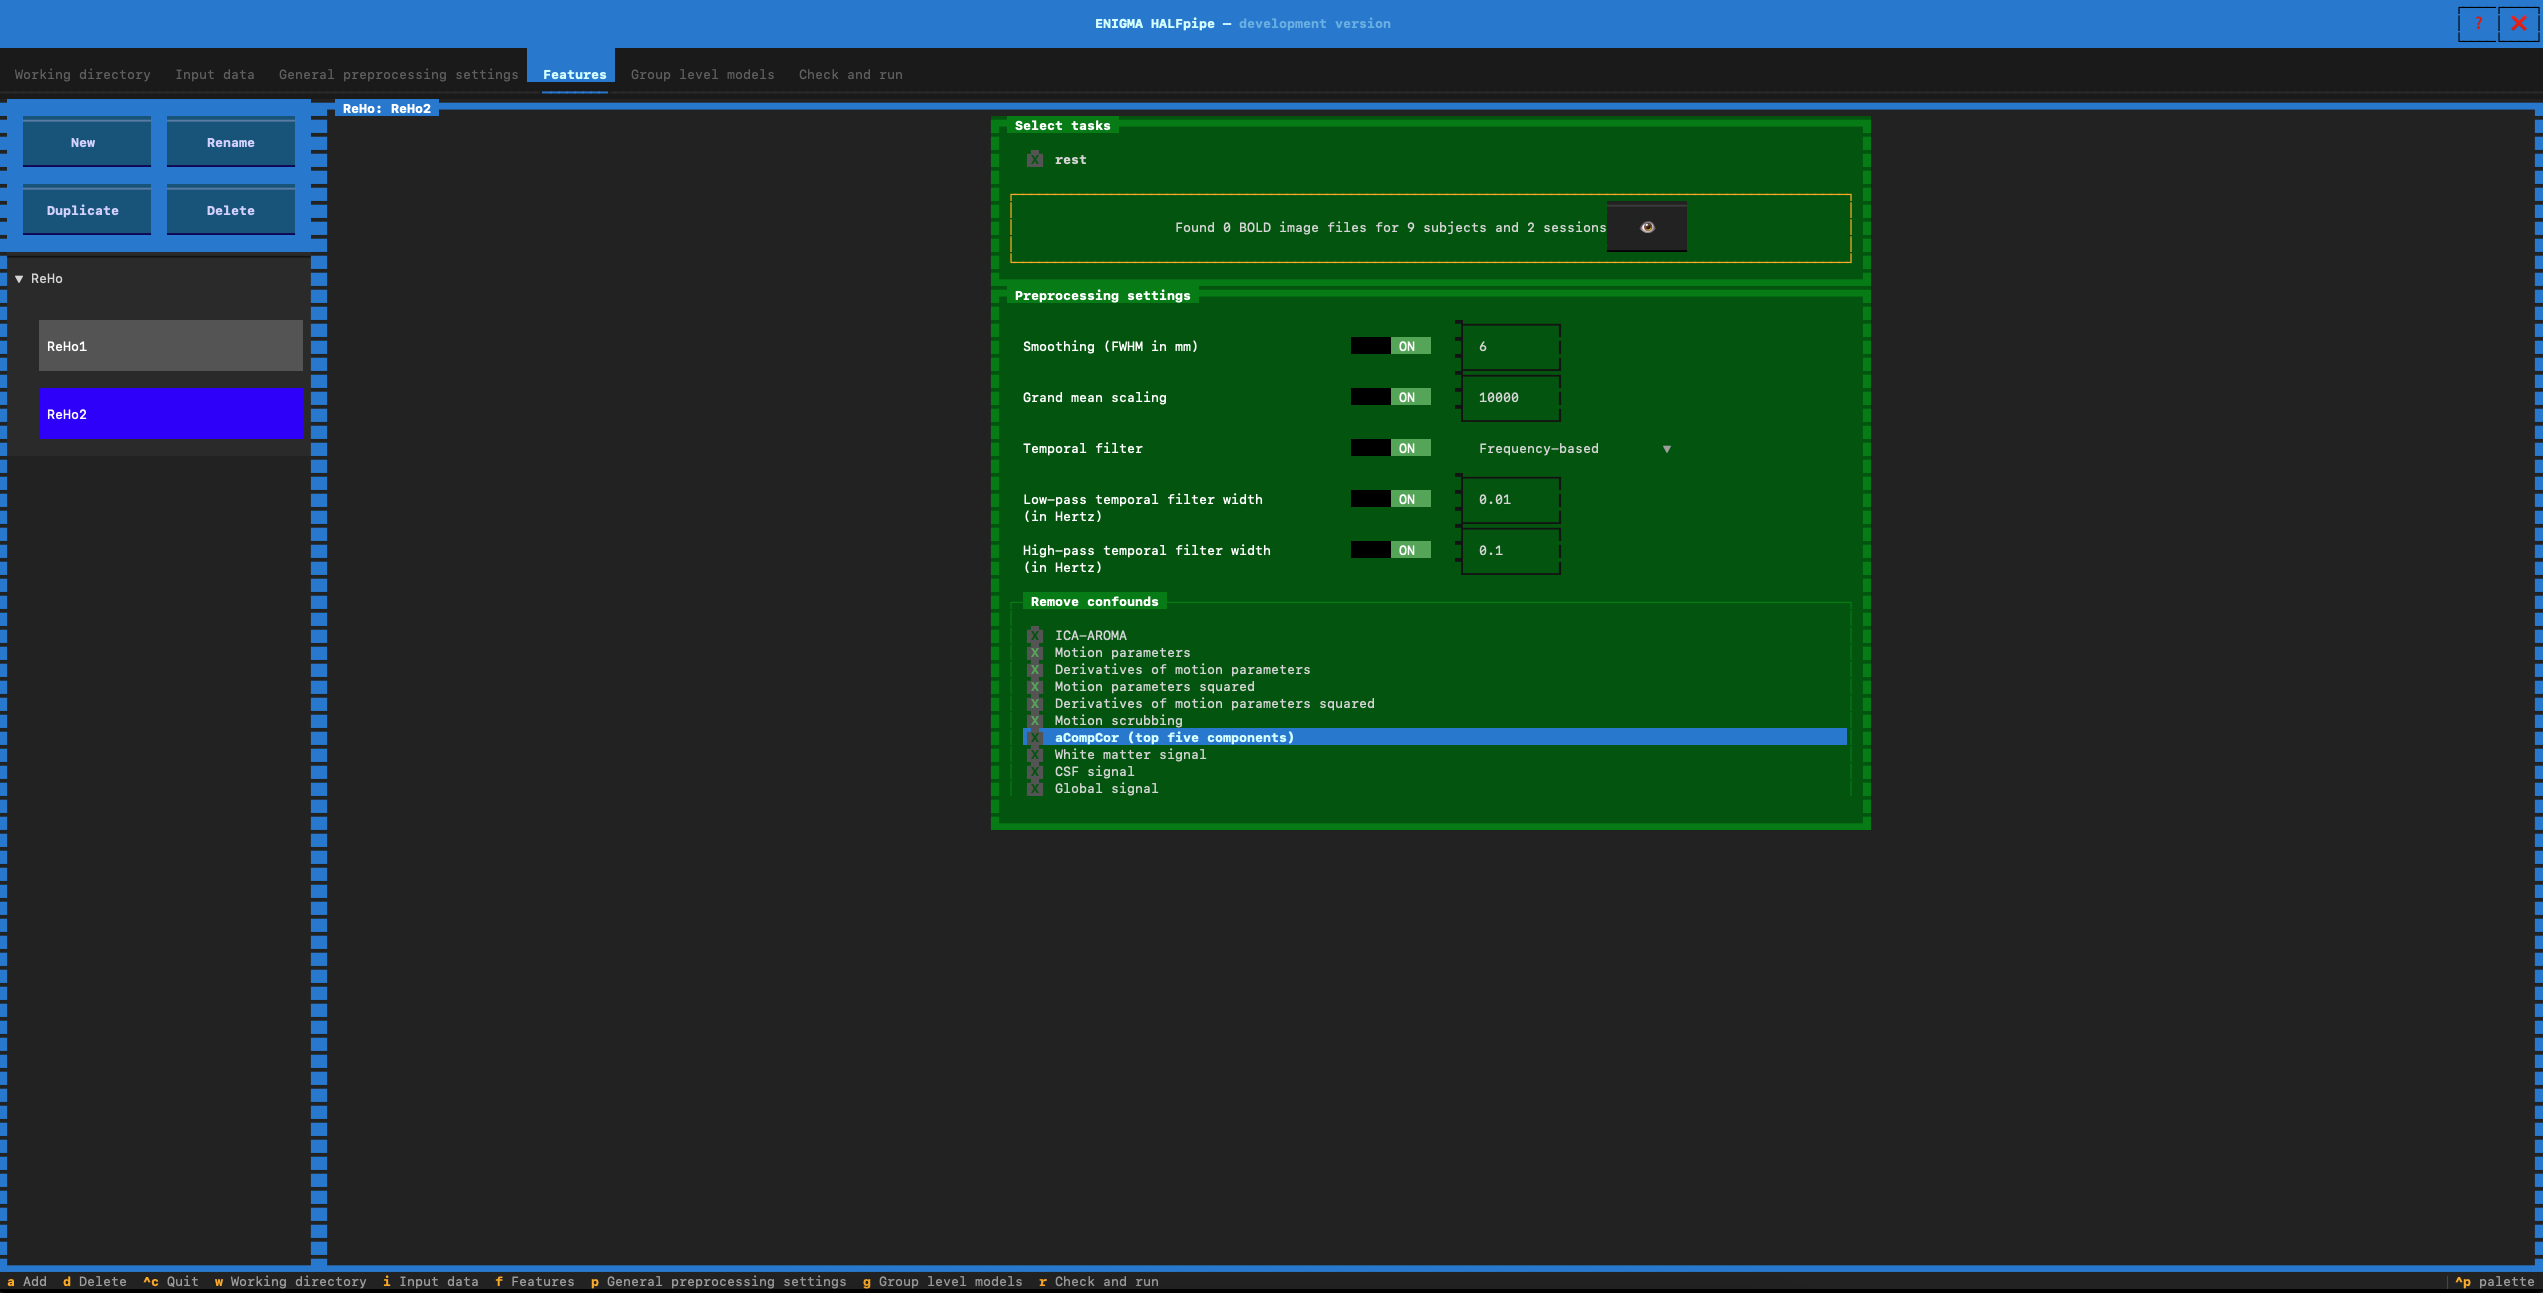
- Feature name: Enter reHo2
- In preprocesssing settings: verify that low-pass temporal filter is set to ON (0.01)
- Go to the Remove confounds section and select the confounds for Pipeline 2:
- Pipeline 3:
- click Duplicate in the left navigation bar.
- Feature name: Enter reHo3
- In preprocesssing settings: verify that low-pass temporal filter is set to ON (0.01)
- Select the confounds for Pipeline 3:
- Pipeline 4:
- Again, click Duplicate in the left navigation bar.
- Feature name: Enter reHo4
- In preprocesssing settings: verify that low-pass temporal filter is set to ON (0.01)
- Select the confounds for Pipeline 4:
✅ Motion parameters
✅ Derivatives of motion parameters
✅ Motion parameters squared
✅ Derivatives of motion parameters squared
- Pipeline 5:
- Again, click Duplicate in the left navigation bar.
- Feature name: Enter reHo5
- In preprocesssing settings: verify that low-pass temporal filter is set to ON (0.01)
- Select the confounds for Pipeline 5:
✅ Motion parameters
✅ Derivatives of motion parameters
✅ Motion parameters squared
✅ Derivatives of motion parameters squared
✅ Global signal
- Once you are done with all the pipeline, click on New in the left navigation bar and go to the next Feature section.
5. fALFF
- Select fALFF
- Feature name: Type fALFF1 (adjust the number for each pipeline)
General settings
- Select task
- If applicable select session(s) or task(s) for resting state data
- Preprocessing settings
- Verify that low-pass temporal filter is set to ON (0.01)
Remove confounds for 5 pipelines
- Pipeline 1: Select the confounds for Pipeline 1. Click on :
We will now repeat the same procedure for the other pipelines.
- Pipeline 2:
- To do so, click Duplicate in the left navigation bar (located below the New button). This will create a new panel for seed-based connectivity, automatically pre-filled with the general settings.
- Feature name: Enter fALFF2
- In preprocesssing settings: verify that low-pass temporal filter is set to ON (0.01)
- Go to the Remove confounds section and select the confounds for Pipeline 2:
- Pipeline 3:
- click Duplicate in the left navigation bar.
- Feature name: Enter fALFF3
- In preprocesssing settings: verify that low-pass temporal filter is set to ON (0.01)
- Select the confounds for Pipeline 3:
- Pipeline 4:
- Again, click Duplicate in the left navigation bar.
- Feature name: Enter fALFF4
- In preprocesssing settings: verify that low-pass temporal filter is set to ON (0.01)
- Select the confounds for Pipeline 4:
✅ Motion parameters
✅ Derivatives of motion parameters
✅ Motion parameters squared
✅ Derivatives of motion parameters squared
- Pipeline 5:
- Again, click Duplicate in the left navigation bar.
- Feature name: Enter fALFF5
- In preprocesssing settings: verify that low-pass temporal filter is set to ON (0.01)
- Select the confounds for Pipeline 5:
✅ Motion parameters
✅ Derivatives of motion parameters
✅ Motion parameters squared
✅ Derivatives of motion parameters squared
✅ Global signal
You have now finished specifying the settings! 🎉
- Click on Check and run in the top navigation bar, and go to the next section.
Check and Run
- Click on Refresh.
You will see the spec.json file that contain all the settings and parameters you have selected.
If you make changes to the settings or selected features, always click Refresh before saving and running the pipeline.
Click on save.
Click on Run.
HALFpipe will generate files that you need to run by submitting jobs on your cluster. Wait for the green confirmation message indicating that the cluster submission script templates have been created
You can then see how to run HALFpipe on HPC
If you are running this on a local computer, the pipeline will have started. Once it has finished, continue to check your preprocessing.